- Check the rough opening dimensions The rough opening height should be equal to the door height plus 2-1/2 inches. A standard door height is 80 inches. The rough opening width should be equal to the door width plus 2 inches. An example, a 30 inch wide door would need a 32 inch rough opening, when installing prehung doors.
- Remove any packaging on the door used for shipping.
*Tip – place 1/2 inch blocks under the jambs if you will be installing carpet.
There are two ways to shim a door: Shimming a door in the jamb and removing the door from the jamb, and setting the frame first.
Pros and Cons: Shimming Doors in the Jambs
Pros: Leaving the door in the jamb saves time because you need the door in the frame in order to square the jamb to the door..
Cons: It can be quite cumbersome (especially with heavy doors), often times this method requires two people. It is impossible to add shims from both sides of the door without a second person.
Pros and Cons: Removing a Door to Shim
Pros: The door frame is much easier to handle with the door intact.
Cons: Often, this will be more time consuming as you’ll need to re-install the door to the hinges to square it with the jamb.
Instructions
In these instructions we will assume the door is left in the jamb.
- Place shims between the door frame and the wall by sliding them in from each side. Do this by each hinge.
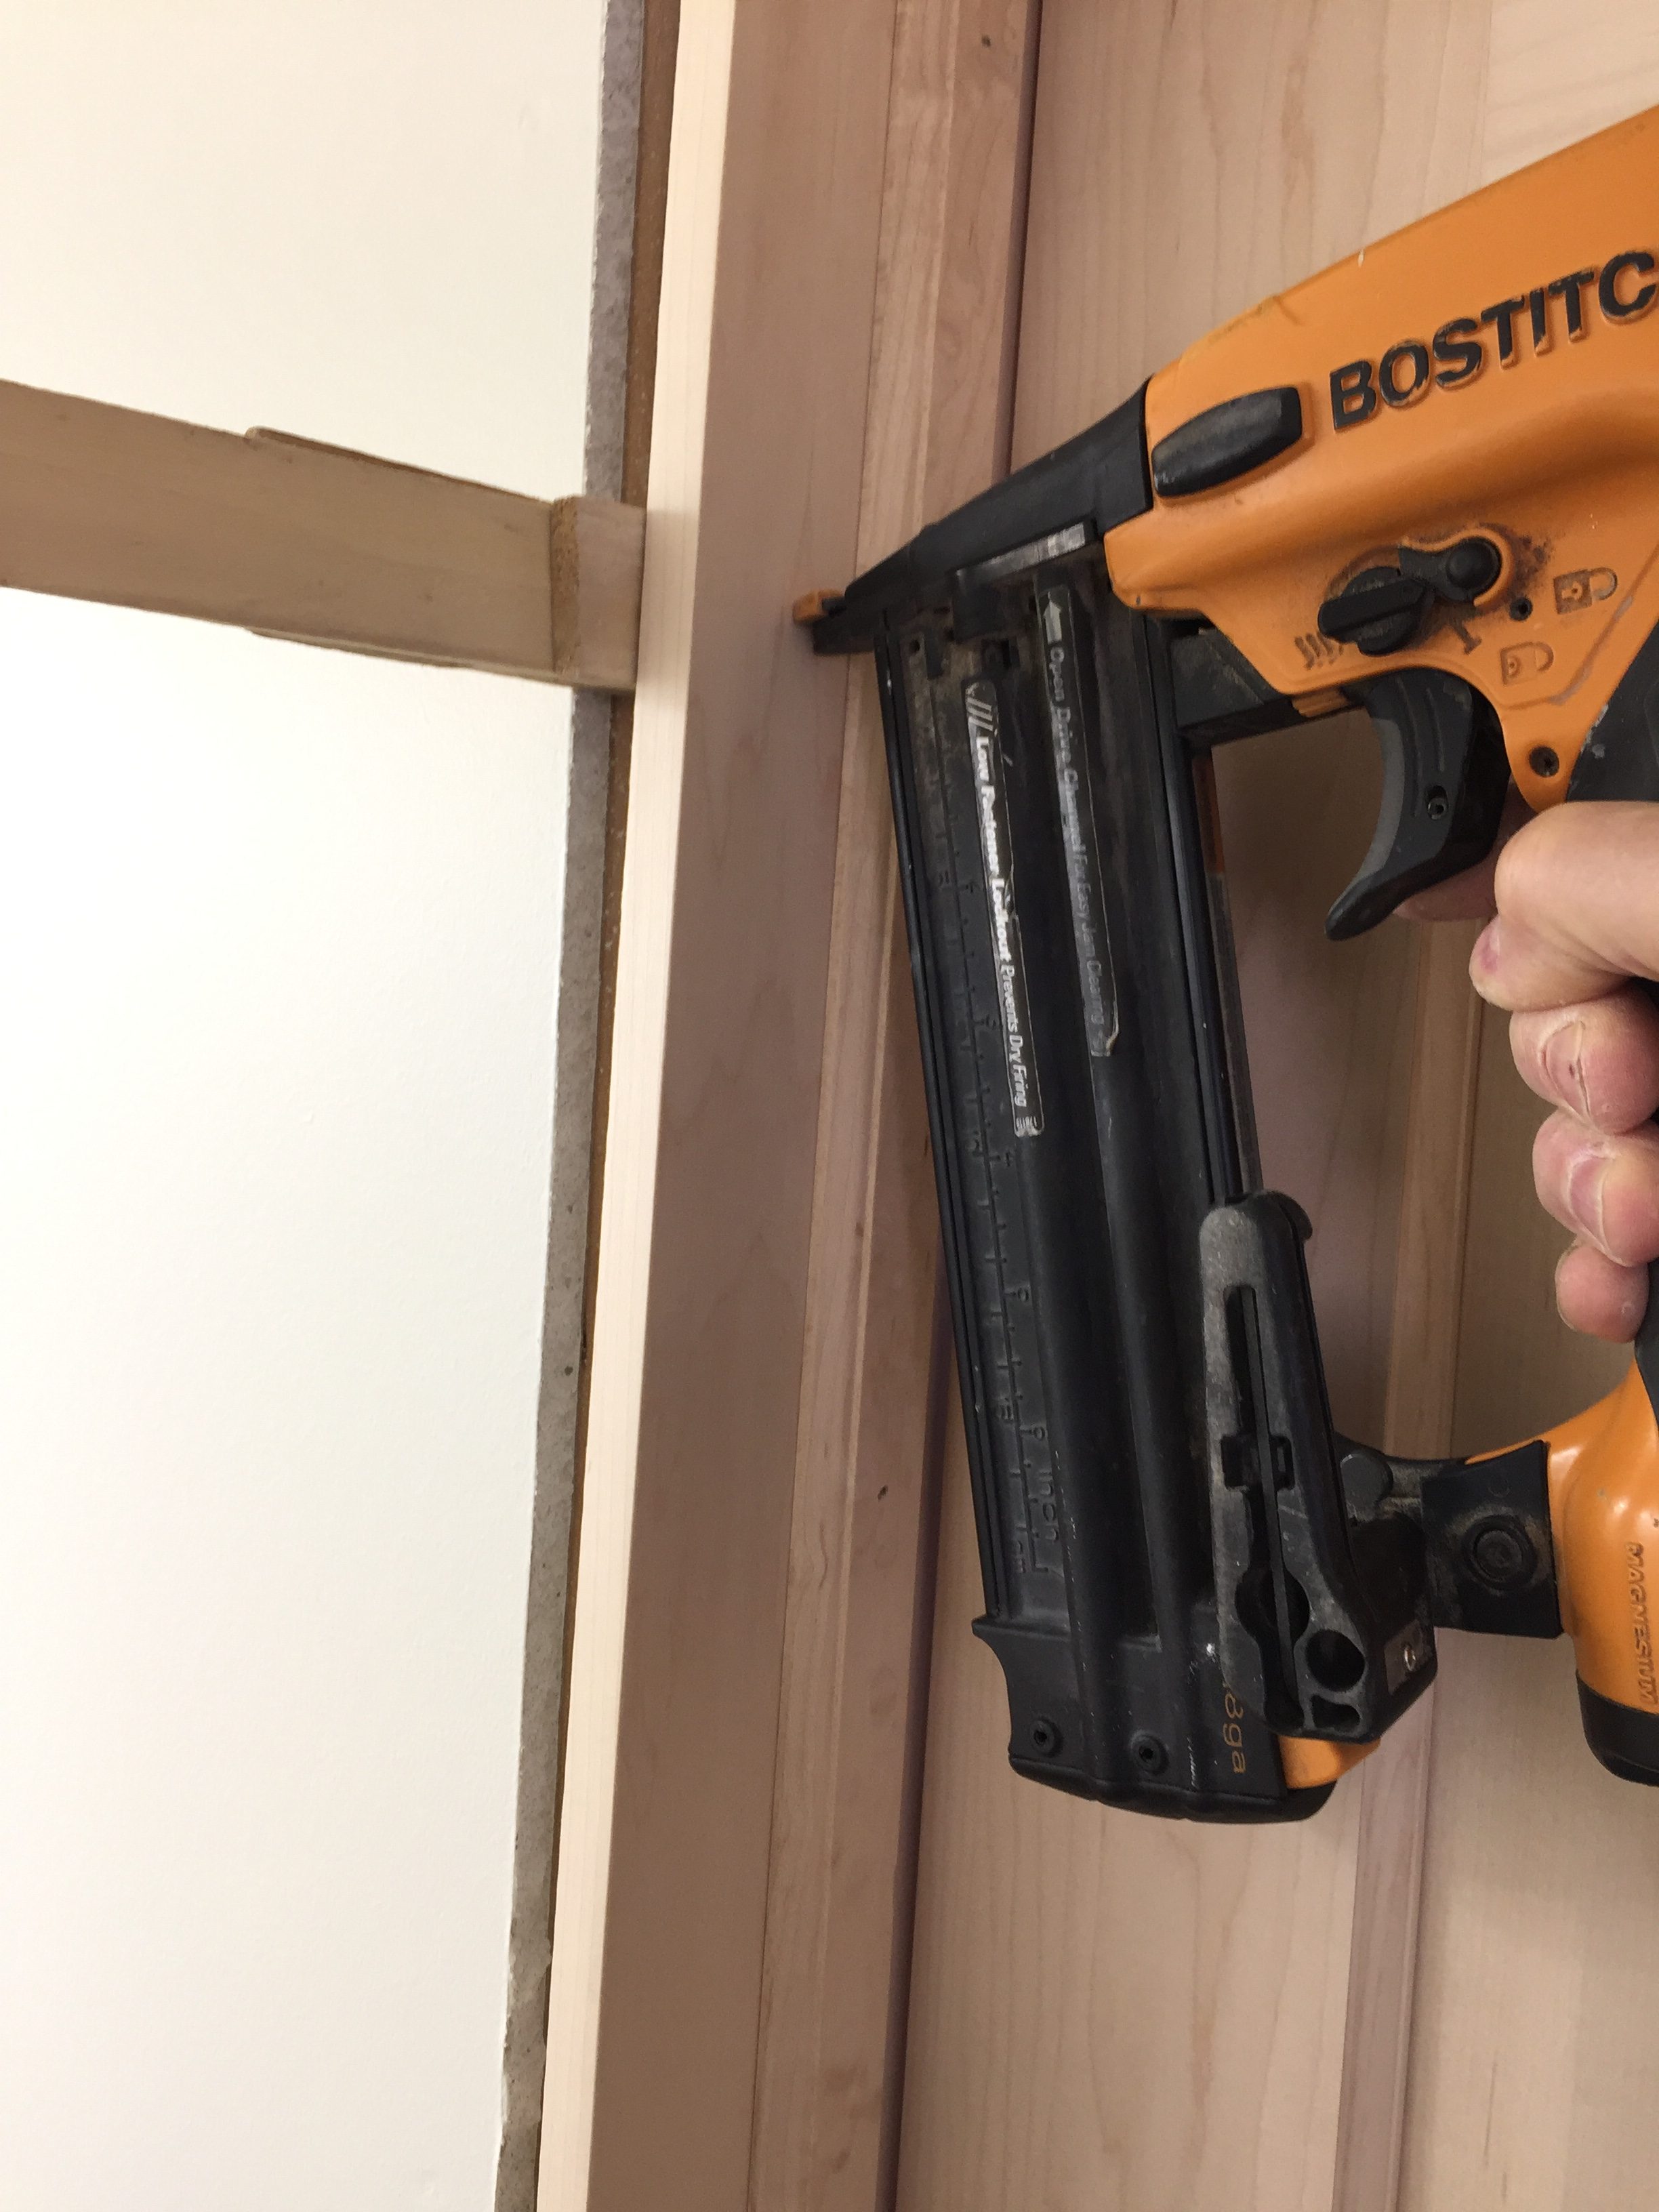
- Nail through the face of the jamb with 2-1/2 inch finish nails under or into the shims to hold them in place. Use a 4 or 6 foot level to check for plumb.
- Check the head (top) jamb for square and level with the previously installed hinge side of the door jamb. Shim the middle and attach to the wall with 2-1/2 inch finish nails.
- Place shims between the wall and the door frame on the latch side of the door. Start at the top, keeping the reveal or clearances as equal as possible.
*Tip – Make sure the door unit is flush with the edge of the drywall.
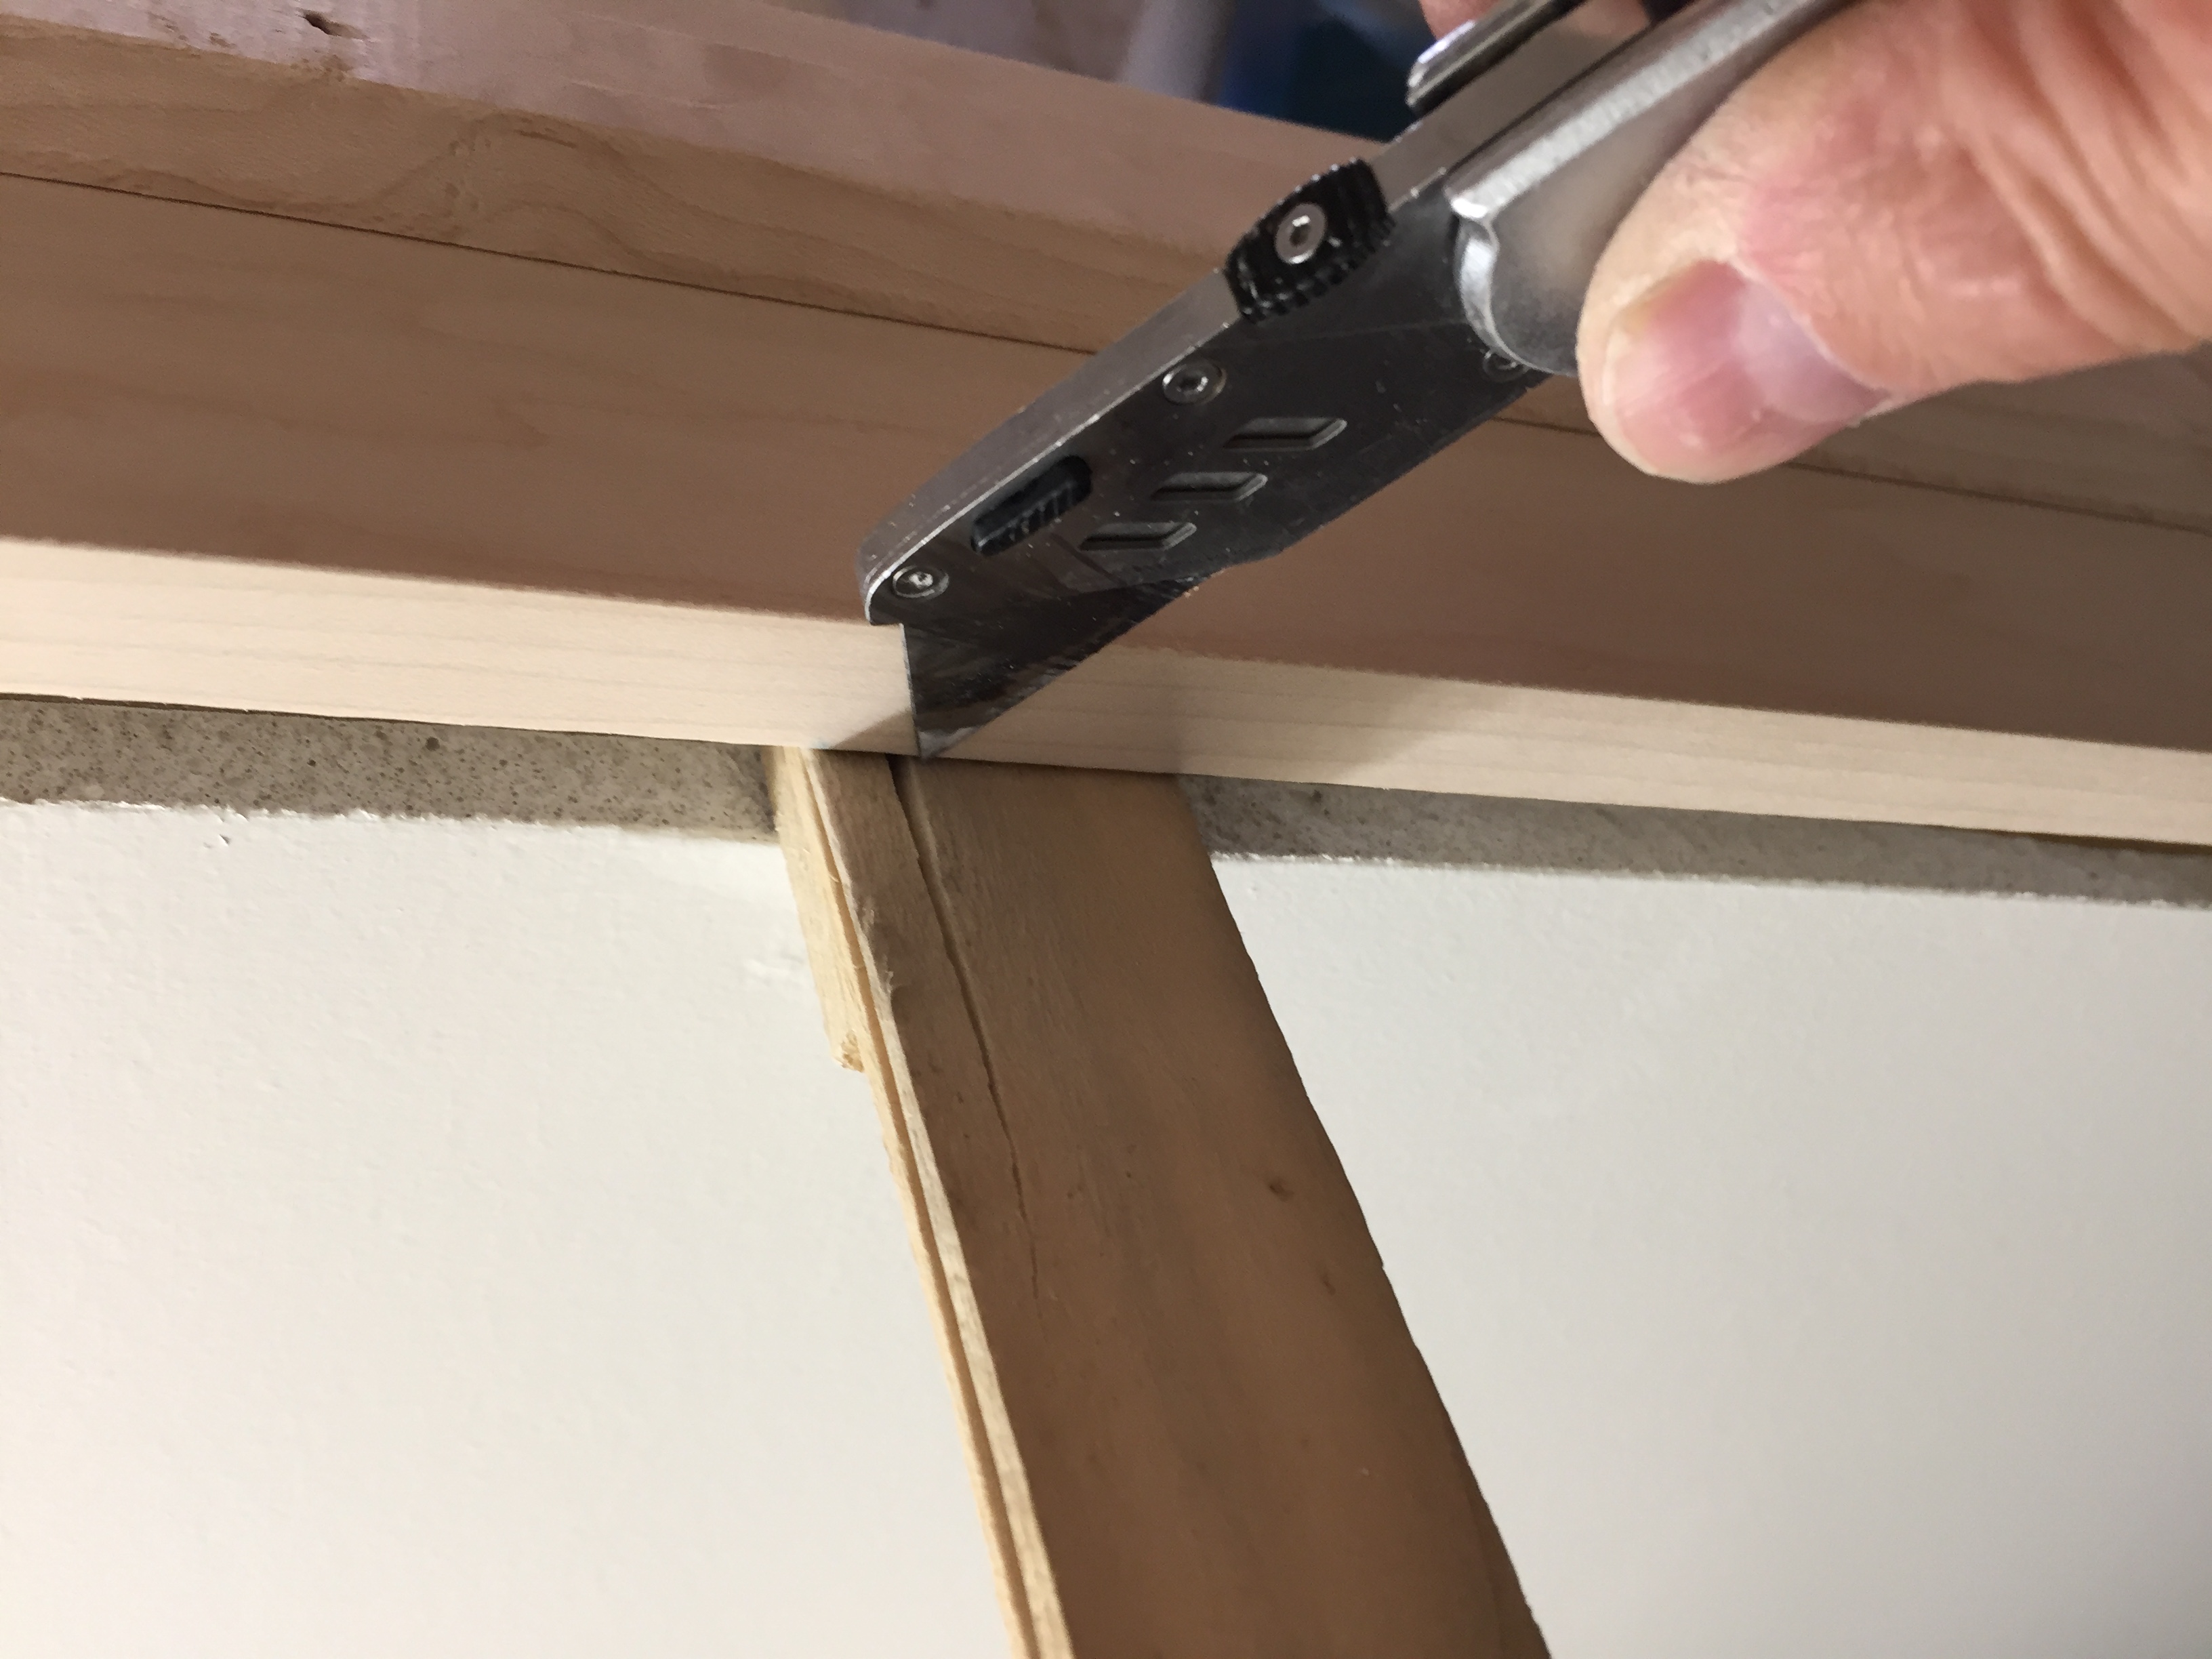
Trim off any excess shims protruding beyond the walls edge with a utility knife. Score both sides, this should allow them to snap off.
- Remove the center screw from the top hinge on the frame and replace it with a 2-1/2” long screw. This can be done on all hinges, but is most important on the top hinge to prevent heavy or solid core doors from sagging over time.
- Install trim. Make sure shims are not protruding beyond the edge of the drywall as this will cause your trim to not fit tightly against the wall.
- Lightly sand the door to remove any small scratches or smudging caused by handling and shipping.
- Stain, paint or clear coat following any manufacturer’s instructions. To prevent delamination or warping, apply finish to all 6 sides of the door.
Want to try an easier and faster door installation method? Watch an interior door installation video now using the EZ-Hang Door Installation System. Hang your doors with door brackets instead of shims.
Door Installation Has Never Been Easier
- Install 5X Faster
- Eliminate Shims
- Perfect Fit Every Time