How to Insulate an Attic
Though it is an often overlooked part of the home, properly insulating the attic can have the biggest impact on heating costs. Learning how to insulate your attic on your own, without hiring a contractor, can help you save even more money.
In this guide, we’ll cover how to blow in cellulose insulation, which is not only cost effective, but also gives one of the highest R-values of any insulation. You’ll need at least one other person to load the blower and someone to be in the attic.
Things you’ll need
- Insulation
- Insulation blower
- Ventilation chutes
- Stapler
- Boards to walk on
- Gloves
- Dusk mask
- Headlamp or light
Buying the Insulation and Supplies
Before buying the insulation, you’ll need to measure the square footage of the attic, so you know how much to buy. The total height of the insulation to be determined by the climate you live in. See the DOE recommended R-Values. You can take a tape measure in the attic with you, or draw a line on some of the studs to serve as a reference point to how high you need the insulation to be. Buy a few extra bags just to be safe. You might need to blow the insulation in thicker in some spots.
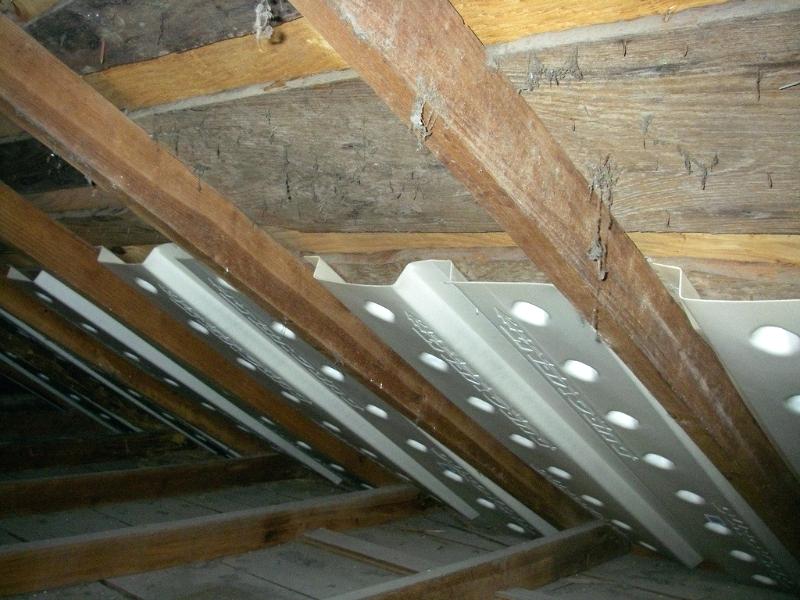
Getting Air Chutes for the Attic
Before buying the air chutes, you’ll need to count how many you’ll need. To do this you can just get up in the attic and count the spaces between the trusses. Vent chutes come in both plastic and styrofoam. Which one choose isn’t too important, but styrofoam might be cheaper and easier to install.
Measure the distance between the trusses to ensure that you buy the correct size air chutes. There are two sizes – one for 16” centers and one for 24” centers.
Renting the Insulation Blower
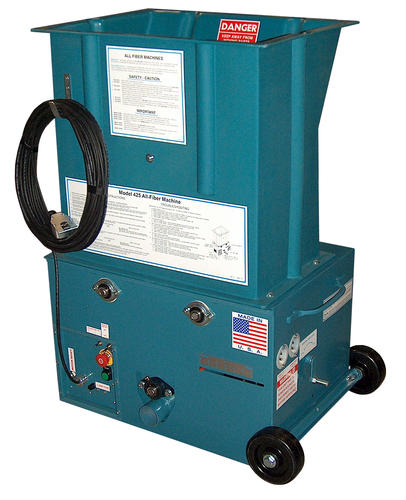
Before you buy the supplies, check to see if the store you plan on buying from offers insulation blower rental. Menard’s offers free blower rentals if you buy your insulation from them. The blower will include a hose with multiple attachments so it will reach everywhere in the attic.
Insulating the Attic
Step 1: Install the Vent Chutes
The first thing you’ll need to do is install the air chutes. You’ll need to make sure you get them deep enough that they go down below the ceiling to allow the air to properly ventilate.
During this entire process, make sure you only walk on the studs, or bring a couple small pieces of plywood to move around and walk on as you.
The best way to install the chutes is to staple them to the roof. This will make blowing the insulation much easier, because you won’t have to worry about holding the chutes while blowing the insulation.
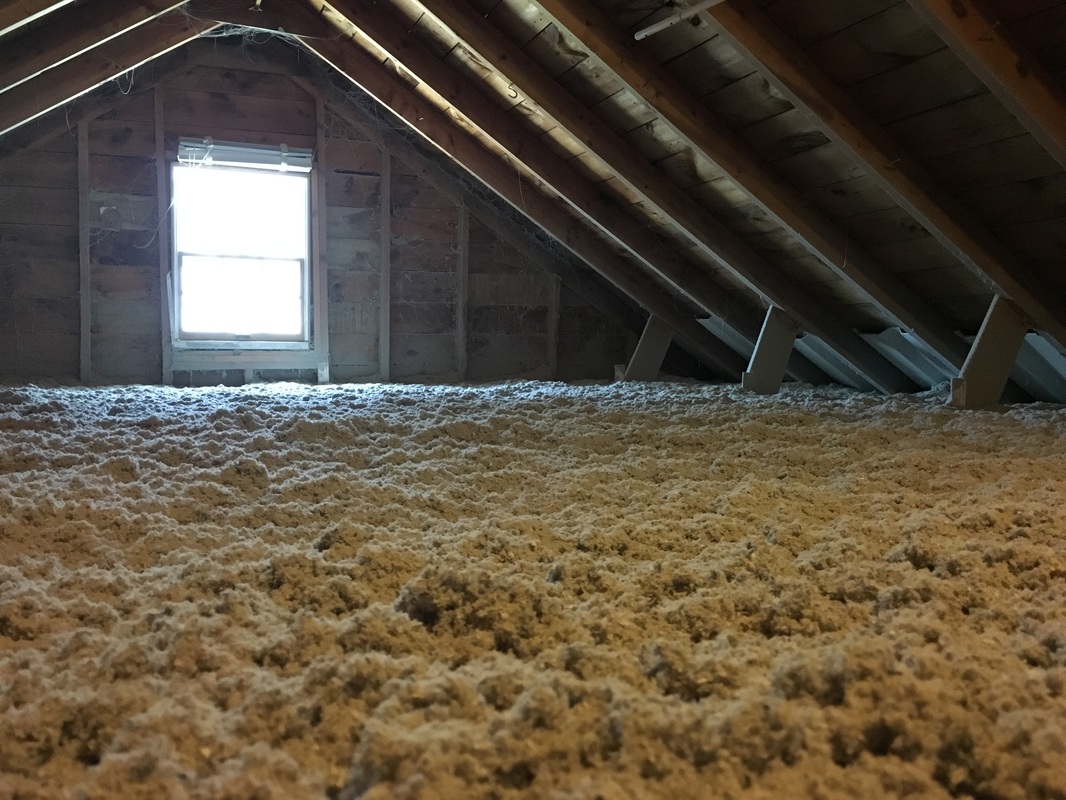
Step 2: Start Blowing the Insulation
After you get the vent chutes installed, you’re ready to begin blowing the insulation. Have one person who stays by the machine and loads insulation, while one goes in the attic and controls the hose. It’s difficult to to communicate with one another once you start the process, but most blowers will have an on/off switch hooked to an extension chord that the person in the attic can keep with them in case they need to stop the flow of insulation.
Have your partner break up and load the insulation into the hopper so it doesn’t clog the hose. If the cellulose comes out too fast or too slow, adjust the opening on the hopper door.
You’ll want to start at the end of the house farthest from the attic opening so you don’t surround yourself with insulation.
Blow the insulation along the eves first, making sure to get it up to the proper height and to cover your vent chutes.
- You can figure out a pattern to follow that makes for the most efficient way to blow in the insulation. This might be to go along the entire length of the house, covering all the eves first, or maybe to start at one end of the gable ends and work from side to side. It all depends on the dimensions of your house.
Step 3: Build a Box to Insulate the Hatch
After you finish blowing the insulation, you’ll need to build box on top of the attic access hatch to avoid any heat escaping through it.
To this, you can simply build a box that matches the perimeter of the opening and is the height that you filled your insulation to. Then fill the box with insulation and close the hatch.
If you have an attic with pull-out stairs and need more instructions, here’s a detailed article from energy.gov.
Door Installation Has Never Been Easier
- Install 5X Faster
- Eliminate Shims
- Perfect Fit Every Time