
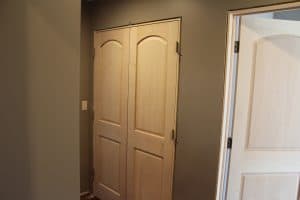
French or Double Door Installation
A good tip (which applies to any interior door installation) is to space the bottom of the jambs off the floor. This will allow you to make adjustments in the heights of the doors in relationship to each other. This principle applies to french doors or even double closet doors. Once you have one door level, plumbed and squared to the jamb, it’s just a matter of raising or lowering the next door to fit the first.
This door installation process is simplified when using the very adjustable EZ-Hang brackets. Watch this video and see just how easy a french or double door install can be. You will get perfect door clearance and gaps between the doors. The use of EZ-Hang door installation brackets has taken this once skilled task and simplified it. Using shims always created the problem of adjust-ability.
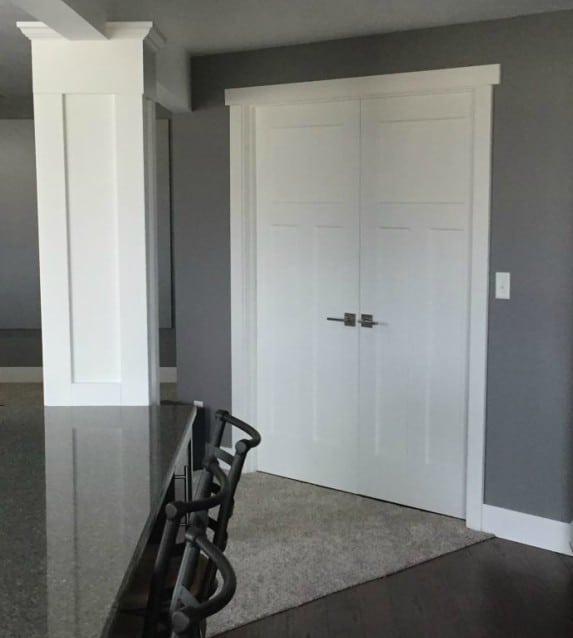
Once the nails and shims were in place, it’s tough to adjust the door frame without removing nails or damaging the jambs. The secret to a great looking french door installation is to have a perfect, even gap or reveal at the top of the doors and a perfect gap between the doors. This really is quite easily accomplished when using EZ-Hang door installation brackets.
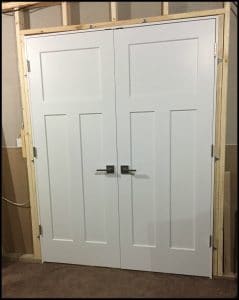
In the above picture, the doors are installed without drywall in an unfinished portion of the basement. View how to do this in our blog post on hanging interior doors before drywall.
Now let’s move on to the instructions for installing a double door.
Instructions: French or Double Door Installation
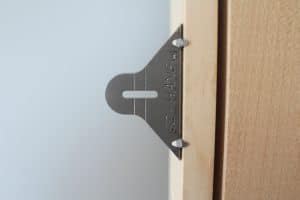
Step 2: Screw the EZ-Hang brackets to the back of the jambs. One under each hinge and one centered on the top. Place 1/2″ blocks under both door jambs if you are installing carpet on the floor.
This will allow the carpet to be tucked under the jambs along with giving you some vertical adjustment to match the pair of doors heights together.
If installing on a finished hard surface floor, check it for level and trim one side of the jambs accordingly if needed.
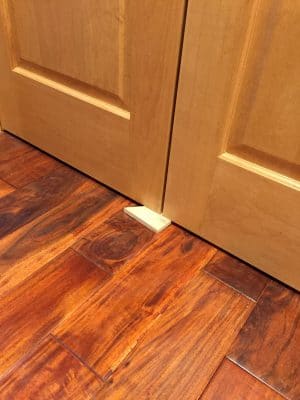
- A good tip is to place a block under both doors to hold them even and keep them from sagging against each other
- This block should be close to equal the distance from the door to the floor when measured by the hinge.
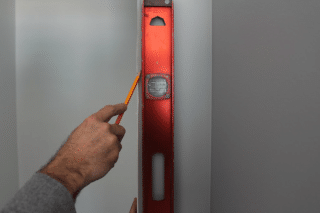
Step 3: Insert the doors and jamb into the rough opening. Starting at the top hinge, match up one of the lines the bracket with the level line drawn in step one.
Screw the door to the wall using the drywall screws provided. Work your way down the side of the door, making sure to use the same reference line for each of the 3 hinge brackets.
There are two lines on the brackets, be sure to use the same line for all the brackets on the hinge side. Move over to the opposite side of the door and repeat, starting at the top again.
Next, check the clearance between the frame and the doors on the top and the gap between them.
Take care to make sure they are equal. If not, slightly loosen the screws and adjust as needed to bring all clearances and gaps to an acceptable visual appearance.
Step 4: Remove the top center hinge screw and replace it with a matching color 2-1/2″ long screw that will penetrate into the wall framing.
Do not tweak or over-tighten this screw, you could pull the doors apart if this happens. Stop when the screw makes contact with the hinge.
This screw keeps heavy doors from sagging over time.