Painting and Finishing: Doors & Trim
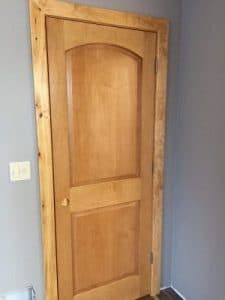
Wiping stain can be applied with brushes or even just old rags. Apply a liberal coat and let it soak in for a short amount of time, depending on the humidity level and type of wood. Normally the longer you wait to remove the excess stain the darker it gets. Don’t let it start to dry, as that will make a mess of your project and leave streaks.
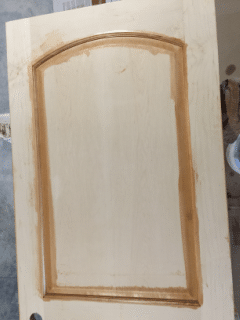
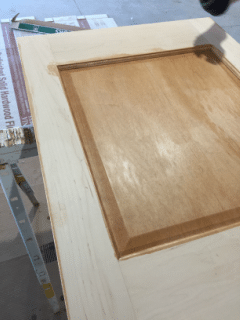
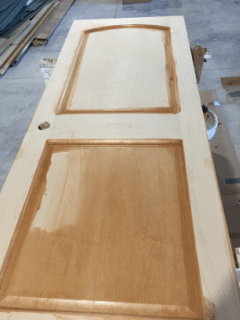
The easiest method is to lay the door flat on a pair of saw horses. This will keep the thin stain from running down the door. If you have panel doors, start by applying stain to the interior of the rails. Then finish the interior or your panel and work your outward until the door is completely stained. Wipe the door after it’s completely stained with a clean, dry cloth to remove any leftover stain residue. if desired, it’s normally not an issue to flip the door over and repeat the process on the remaining side. Just make sure you check both sides of the door when you move it or stand it up to dry. Remove any smears with the clean cloth.
Applying Proper Finish To Doors Aids From Warping
Do you wonder why some doors warp and other seem to stay as true as the day they were made? The reason is usually moisture. If the door has a higher moisture content when it is made at the factory than the environment it will be installed in, when is dries, it is possible that shrinking and warping may occur.
Now on the reverse side, when the door is made at the factory with a lower moisture content than the environment where it is installed, can also cause problems. Some swelling and warping is possible here too. Another problem is seasonal changes. If you live in climates with cold winters, running the furnace and drying out the inside air can raise havoc with many wood products. Wood doors take in moisture in the hot humid days of summer and rainy seasons of fall. When winter arrives the cold outside air is dryer than other seasons air, now your running the furnace and drying the air even more.
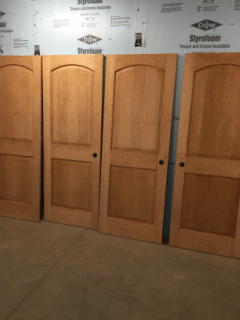
The result is doors warping, or if your lucky, just not latching properly. It seems to be a battle you can’t win. So how to you fight this? Try to store the doors where they will be hung for about 24-36 hours prior to installing them. Apply two coats of finish to all the 6 edges of the door. A single coat can leave the door vulnerable to moisture. Don’t forget the important top and bottom. If you miss these areas your likely to experience some problems sooner or later.
Follow these instructions for painting or clear sealer over stained doors. Be aware that stain is not a sealer and will not keep out moisture. Its purpose is for color only. When applying these sealers be sure to keep the doors on a flat surface or fully supported. Once the sealer is applied the moisture content of the door rises, making it slightly flexible. This is caused by the wet sealer or paint soaking into the wood.
If the door is not supported correctly, it can take on the shape of the position the door is set in while the sealer/paint is drying. Once the sealer/paint dries, your left with a bowed or warped door. I don’t recommend leaning a door against the wall to paint it either. The weight of the door can cause a bow following this process. I have had many contractors tell me the doors fit fine until the painters took them off and painted them. Now you know why.
So let’s review:
- Set the doors where they will be installed before you hang them
- Apply finish to all 6 edges of the door
- Use two coats of finish to keep moisture from penetrating your door
- While this is no guarantee all problems will be eliminated with warping, swelling or shrinkage, paying attention to details give the best shot at a quality lasting installation.
Polyurethane vs. Lacquer
Other popular solvent based choices include polyurethane and lacquer. Polyurethanes are slower drying (normally 4-6 hours) and don’t actually absorb into the wood. They dry on top and act as a protective coating. When brushing poly it’s difficult to achieve a very smooth finish without leaving some noticeable brush strokes. If you decide to spray, most likely thinning will be needed. This will allow the thicker bodied urethane to make it’s way through the sprayer.
Lacquers are fast drying and usually can be re-coated in 4-6 hours. When brushing don’t over-brush or apply too much product at one time. If you spray, thinning would have to be done with lacquer thinner. The biggest drawback would be the high voc’s . Lacquer is extremely irritating to the nose and eyes because of the noxious odor.
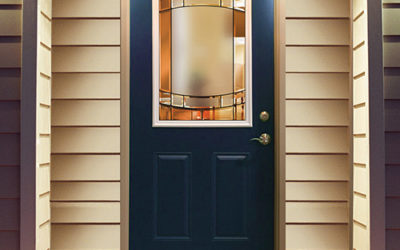
Exterior Door Weatherstripping Sticks to Doors
Weatherstripping sticks to freshly painted doors. Knowing this in advance will allow you to plan ahead when installing your exterior door. The paint actually will take longer to dry than you think. Even if you wait 24 hours and if the paint feels dry to the touch; that isn’t enough time.
Full curing of the paint can take up to a few weeks. I know this seems like a long time but it’s the best way to be assured the weathestripping won’t stick. When it does, the paint will stick to the weatherstripping, and you will be left with missing patches of paint off the door. Usually the water based paints will dry faster than an oil base. However, it doesn’t matter if you use oil or water based paints, as both will stick.
Plan ahead and paint the door prior to installing it. Another option is to install the door and then remove the weatherstripping. Most new doors have a groove that is cut into the jamb that the weatherstripping is inserted into. Start at the top or bottom and pull it out of the groove. Lay it on a flat surface until the paint on the door is dry. If you have a wooden jamb, painting them with the weatherstipping removed is much easier. You should never paint the weatherstipping itself.
Don’t forget temperature and humidity play a major role in the dry time of paint. Paint does not dry well on humid days, even when it’s warm. Check the manufacturer’s recommendations for best temperatures for proper drying.
Filling in Nail Head in Door Trim to get Pro Results
Select the Right Fastener When installing trim, use the correct size nail. Add the thickness of the trim, any drywall and add ¾”, this needs to be the length of the finish nail and should give sufficient holding power. Using too large of nail creates a large hole which is harder to fill. New trim guns and brad nailers work well. The heads of the nails are small and countersinking is accomplished during application.
If you don’t happen to own one, hand nailing works fine. A good tip here is to use a nail set the same size or slightly smaller than the nail applied. This will keep the hole size to a minimum. The smaller the hole the easier to fill. Fill the Holes First on Painted Trim Steps for completing the filling process of painted trim and stained trim with a clear finish are different.
On painted trim, filling the hole must be completed prior to painting. Once you have the nail head just below the surface of the trim, fill it with caulking, wood putty, spackle or even car bondo. Each of these materials has benefits and disadvantages to their use. Caulking and wood putty normally require two coats because they shrink. Bondo can normally be completed in one application, but is difficult to work with, difficult to sand and dries quickly.
Sand it Smooth Once the material of choice has dried, sand it smooth with fine grit sandpaper. This is critical step for a blemish free paint job. If the holes are not completely filled flush after the first application, you must apply another, as any slight indentations will be noticed. Apply the Top Coat Top coat the primed trim with two coats of semi-gloss or gloss paint. This paint is normally more durable and cleans easier than flat paint. Oil based paints also tend to be harder than latex paints.
However, latex paint is water-based and is easier to apply and cleanup. A good alternative could be to use an enamel or acrylic paint. This would give you a slightly harder paint than just latex. Adding a paint conditioner to the paint extends drying time and decreases unsightly brush strokes. Putty After Finish is Applied on Stained Trim When your trim is stained with a clear finish, apply colored wood putty matching your stain color. Put some on your finger and press into the hole. Wipe it clean with a cotton cloth.
You need to have at least one coat of your clear finish applied to the trim prior to filling the holes. If you don’t or if you putty the holes prior to staining, a blemish will usually be left behind. Most colored putties have an oil base and will stain the wood if a finish isn’t applied first.
The secrets to professional looking trim aren’t difficult. Just take your time and make those unsightly nail holes disappear.
For more information on this topic, see: common door installation problems and fixes.
Door Installation Has Never Been Easier
- Install 5X Faster
- Eliminate Shims
- Perfect Fit Every Time