Installing a Door Without Shims
If you’ve ever tried to install a door using shims, you know how difficult it can be. Even with a perfect rough opening, getting all sides the jamb to balance with shims is difficult enough. Aside from being difficult, installing a door with shims is unnecessarily time-consuming.
There are many other drawbacks to using shims as well, such as needing to nail through the face of the jamb and needing to work from both sides of the door.
Luckily, there is an easier method for installing doors that allows for easy adjustment, no face nailing through the jamb, and enables anyone of any skill level to install a door 70% faster than shims.
Quickly Installing a Door: EZ-Hang
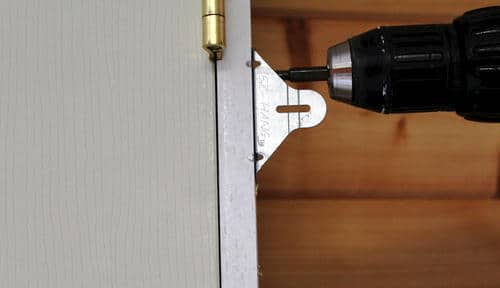
EZ-Hang is a bracket system for installing doors that simplifies the process and increases the strength of the installation. It does this by using metal brackets that attach to the frame of the door and to the rough opening. The brackets have a reference line on them that makes it very simple to get the jamb perfectly level in the rough opening.
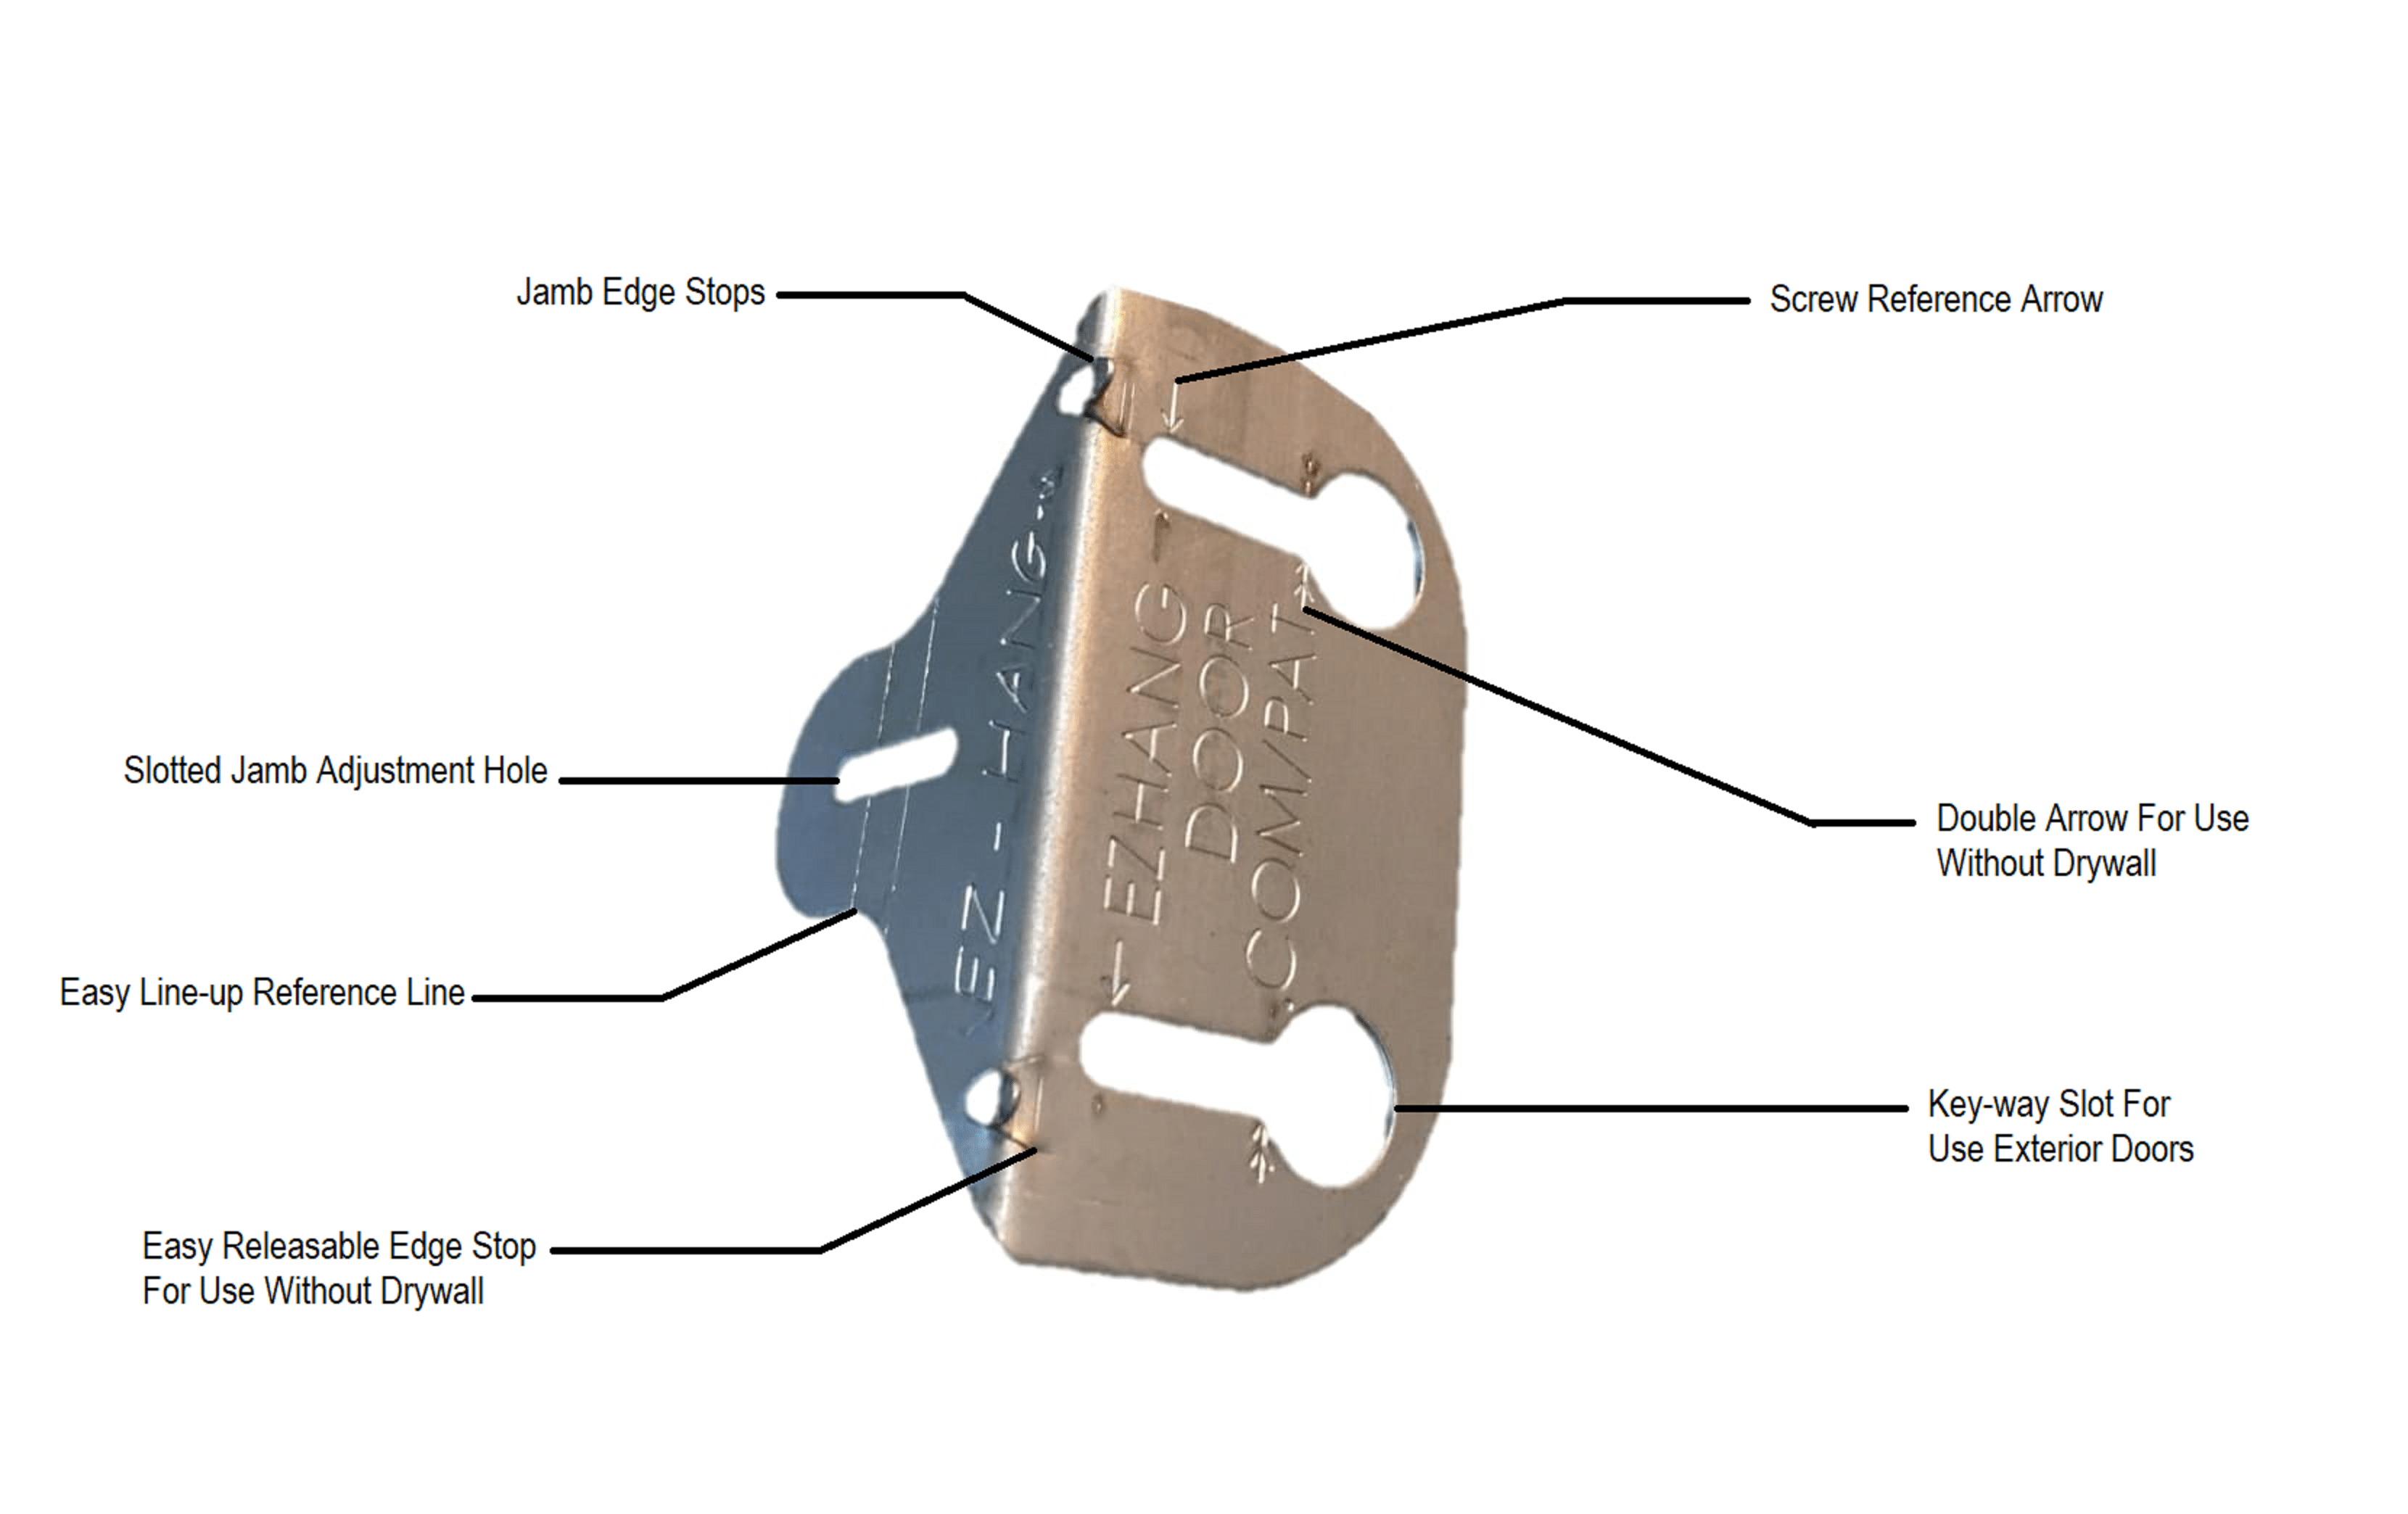
EZ-Hang comes with seven brackets, and all the screws you’ll need to install a door. This allows for 3 brackets on each side of the jamb and 1 bracket for the top of the jamb. It’s essential to secure the top jamb, as they tend to come slightly bowed from the manufacturer. This makes installing a door without shims not only easier, but stronger and more secure.
Attaching Door Installation Brackets
Now that you know why using installation brackets is a superior method to shims, it’s time to learn how to use them. EZ-Hang door installation brackets install with three simple steps.
Step 1. Draw a Plumb-Line
First, using a level you’ll draw a plumb-line one the wall, about 1/2 inch in from the rough opening, on the side of the wall where the door hinge will be. This will serve as a reference line to attach the brackets to in the final step.
Step 2. Attach the Brackets
Next, you’ll attach the brackets to the door jamb. You’ll do this using the 1/2″ screws provided. Install the brackets below each hinge. The edge stops on the bracket will keep them even with the jamb. Start on the top jamb, then move to the hinge-side. Repeat on the knob side of the door, starting 12″ down from the top, 2″ above the latch hole and 6-8″ up from the bottom.
Step 3. Install the Door
Now you’re ready to install the door in the rough opening. Set the door into the rough opening, then line up the reference lines on the brackets with the reference lines on the wall and attach the door to the rough opening using the included drywall screws.
For more details, check out our interior door installation page.
EZ-Hang Vs. Shims
As you can see, using EZ-Hang brackets is a much easier method for installing doors when compared to the outdated method of using shims. Installing a door without shims is much easier. Aside from being much quicker and simpler, EZ-Hang also means:
- Less clean up time
- No face-nailing through the jamb
- Easy adjustment
- A simplified, reliable process
EZ-Hang
- Hang a door in 5 Minutes
- Work from one side of the door
- No experience required
- Trim fits perfectly over bracket
- Hang a door by yourself
- Patented easy adujustment
Shims
- Average install time 20-30 min.
- Must move back and forth
- High learning curve
- Shims must be cut perfectly
- Requires 2 people
- Constant readjustment required