Door Installation Problems: The Ultimate Guide
Common Door Installation Problems
Many unforeseen problems can occur when installing doors. Many of them are caused by improper framing, misaligned bottom plates, un-level floors or a wall that is simply not plumb. Obviously, tearing down walls with these problems and re-building is not a cost effective or easy method to corrections. So, how do you make your door installation look great, work properly without going through the costly and labor intensive procedures to fix them? Most door installation problems can be solved if you know a few simple tricks.
Misaligned Bottom Wall Plates
The most common problem caused by the bottom plates not being straight across or out of alignment is you just can’t seem to get the door to fit tightly to the door stop. A common term for this is your door is out of plane.
There are a few fixes to this problem, most of which are completed by trial and error. Your door jambs (hinge and latch side) need to be in the same plane for it to close properly against the door stop. Let’s say the door is out on the top latch side (sticking out on the top, beyond the jamb).
To fix this you need to move the bottom of the opposite side (the hinge side) out in the same direction as the door is sticking out. This will push the top of the door inward. With the hinge side brackets attached, using a block of wood placed against the outside (the side opposite the hinges), slightly hammer the door in the proper direction. Close the door and check for fit to the stop.
You can also slightly move the top of the door in once you screw the latch side brackets to wall, by tapping slightly out on the top of the jamb with a block and hammer. Sometimes you will need to move all 4 corners a little so everything fits snuggly. Normally not enough that it can’t be covered with trim. You may need to ease the edge of the drywall so the trim will fit tight against the wall.
In other words, the door jamb gets installed plumb regardless of how the walls are. Usually you split the difference on all 4 corners of the door so that you don’t end up having one part of the door jamb sticking out way past the drywall and one part of the door recessed way into the drywall. When your trim, the door casing, is applied to the opening it will cover up any irregularities.
Other problems may occur if the door is not installed plumb is that the door may want to continually swing open (or closed) or it may even drag on the floor when opened wide. So you always try to hang doors plumb whenever possible.
The easiest way to visualize this would be to imagine your door and jamb lying flat on the flat on the floor. When all 4 corners are laying in the same plane or flat with each other, the door fits tight to the stop. If you raise any one of the corners off the floor, it will change how the door fits to the stop. So imagine needing to install your door in the opening so all 4 corners are in plane or flat with each other.
Door is Uneven at the Top
When you have an uneven gap across the top of door, it can be caused by two common problems. The first is the door hinge side is out of plumb. This can be easily checked with a level placed on the jamb or hinges to check if they are correct. The most likely cause is that the floor is not perfectly level.
When the door is placed directly on the floor and it’s not level, it causes one side of the door, hinge or latch side, to be higher than one another. The easiest way to solve this problem is when installing the door, space the jambs off the floor when possible. Always do this in new construction or when there will be carpeting installed on the floor.
This does a couple of good things: First, it allows you to raise or lower the door jambs independent of the floor, now you can make the gap perfectly even across the top. Most floors have imperfections in them that will hamper a door installation, so this a fairly common problem. Second, it raises the door off the floor usually enough so you don’t need to cut or trim it off.
If you’re putting a door in on a finished floor, you may need to cut or trim one side of the door jamb, either the latch side or hinge side. Place a level on the floor and level it. Measure the gap under the low side of the floor. This is the amount you need to cut off the HIGH side of the door jamb.
In this picture, notice how the gap is larger on the latch side of the door. The correction for this would be to raise the hinge side (left) or cut off the latch side (right).

Trim Doesn’t Fit Tight
Installing trim with perfect miters isn’t as difficult as you might think. When the gap is open on the face of your trim, no matter how many times you cut it, it probably needs to be back cut or slightly beveled back so just the front edge of the trim hits together.
This simple tip is easily accomplished and your trim will look professionally installed! See how to back cut trim with two different methods using your miter saw. Check out this trim installation video for more details.
Checking For a Warped Door
If your door appears to be warped because it doesn’t fit tight to the door stop or weather stripping, it could be caused by an installation problem. The pre-hung unit could be out of plumb with the wall. Doors, when installed properly, need to be plumbed sideways (hinge to knob side) and inside to outside. This basically means that the lockside frame and the hinge side frame are twisted in the rough opening. The door needs to follow the same plane as the hinge side.
If the lock side doesn’t line up perfectly with the hinge side, the door will appear to be extending into the room or not fit tightly to the door stop. This will give the appearance of a warped door. You can check to see if the frame is twisted with a 6′ level. Place the level on the length of the hinge side, noting where the bubble is in the level. Now check the latch side, noting the bubbles need to be in exactly the same location. If not you may need to adjust your frame.
This can be caused by walls out of plane with each other (misaligned bottom wall plates), or just a poorly constructed wall. If all looks good with the door jambs, the next step is to check for a warped door. The best way to check a door for warp is with the string test. You will need a medium to light gauge string.
- Take the string and wrap or tape it to the top of the door.
- Pull the string tight to the bottom of the door. If the door is warped it will show up as a gap between the string and the face of the door.
- Check the door from corner to corner on both sides of the door. You will then surely know which direction the door is twisted.
Rough Opening Too Big
In some cases such as an older home or if the rough opening for your door is just too large, you will need to reduce or shrink the rough opening down to allow for a easier installation. A good and simple solution is to add a 1″x3″ furring strip to one or both sides of the opening.
Notice how this gives a surface to draw a plumb line and something solid to attach the EZ-Hang bracket to. See how, in the picture below, adding a single 3/4″ thick material will normally allow a standard 2-1/4″ casing to be applied. If you add anything thicker, most likely a wider trim would be needed to cover gap. Correct size openings can be found on the rough opening page.
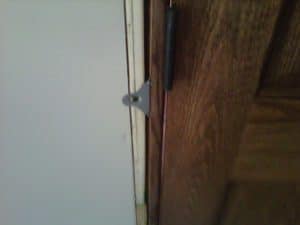
Fix a Loose or Stripped Screwhole with a Golf Tee or Matchstick
Have you ever had the experience of a screw in a hinge that just won’t stay tightened and is always loose? The problem is the screw is stripped and the hole is now too big. One option would be to use a bigger or longer screw. This would be fine as long as the new screw matches the old ones.
A few other fixes come in handy, and most of the time they are completed with something you are sure to have on hand. First remove the loose screw from the hinge. Here are a few things that can be inserted into the hole to make a new hole with:
Use a Golf Tee – Add wood glue to the tip and side before tapping it in the hole with a hammer. Let the glue dry and cut it flush with the wood using a coping saw or wood chisel.
Use the End of a Matchstick – Add wood glue to the tip and side and tap it in. Since the match stick is most likely made of pine you should be able to cut it flush with a utility knife. Score it and snap it off. You may want to strike it first and let it burn off before using it. Don’t burn down the house fixing a door hinge. That would be a bummer..
If your hole is small, use toothpicks. Add the glue, shove them in and let it dry. Cut them off with a utility knife, chisel or coping saw. Replace your screw and you will have a good as new wood. This tip will also work for other types of stripped holes like door latches and cabinet hinges.
Simple Fix for a Door that Closes on it’s Own
Having a door that closes or swings open by itself can be very irritating. Although, it only requires a few minutes to fix. This is caused by the door being out of plumb, the door simply swings open or closed under its own weight.
The fix – apply some resistance in the hinges. Start by closing the door. This will keep the weight of the door from binding on the other hinges. Remove the top hinge pin and lay it on a concrete floor. Using a hammer, strike the pin in the middle, this will cause a slight bend in the pin. Simply tap the pin back into the hinge and test the door.
If one pin does not cause enough resistance, you may need to repeat this process on the middle hinge. In extreme cases you may need to bend the bottom pin also. Another solution is to wrap a few revolutions of masking tape around the pin instead of bending it. While this will work, over time you may need to re-apply the tape as it breaks down.
Fixing a Squeaky Hinge
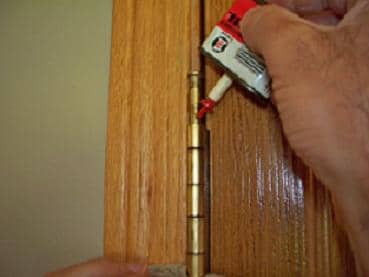
With the door closed, use a nail to insert under the hinge pins and tap up on the bottom of the pins until they are raised about half way. Using a small oil can and holding a rag under the hinge to catch any spilled oil, squirt a few drops of oil on the raised hinge pin.
Open and close the door a few times to work the oil into the pin and hinge. Repeat this on all the hinges or until the squeak has stopped. Use a rag to wipe any excess oil from the hinge. You should now be able to enjoy a nice quietly swinging door. With the door in a closed position you can completely remove the pins one at a time and wipe them down and apply the oil. This also makes it possible to take them outside and use a spray lubricant if desired.
For more information, check out our post on how to fix a squeaky door.
How to Fix and Trim a Rubbing Door
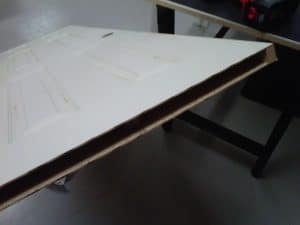
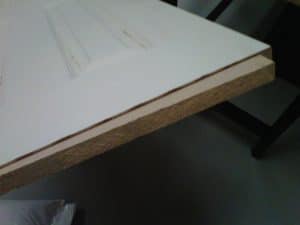
You will need to cut the bottom of the door. If the door rubs for too long on the carpet it can cause the fibers to break down and leave a permanent swing mark. Measure down from the bottom hinge to determine how much you need to trim. Don’t overestimate how much you need to take off. You can always re-cut the door; but you can’t add back what you have already cut off. Remove the pins from the hinges and set the door on padded or covered sawhorses.
Steps:
- Tape the bottom of the door where you will be cutting to minimize chipping.
- You can also tape the bottom of the circular saw to protect the door when cutting.
- The most important part is to be sure you have a fine toothed sharp blade.
- You can clamp a straight edge to your door to keep your cut straight.
- Cut the door with a circular saw.
- Lightly sand the edges where you cut.
- Apply finish to the bottom of the door (paint or clear-coat) to protect the door and reduce warping.
Door Pops Open on it’s Own
You have installed your new door, shimmed everything perfectly, or so you think, you close the door and it pops open just before it closes all the way. What causes this and what can you do to eliminate it? This is a typical door installation problem.
You are experiencing what is called hinge binding. This happens when the hinge side of the jamb has a slight tow in towards the door. The hinges or the edge of the door are making contact with the jamb prior to the door completely being closed. In other words, the jamb is not at a perfect 90-degree angle to the door and the door hits the jamb not allowing it to completely close.
This is caused by over shimming the door jamb opposite the hinge side. If you have used shims you may need to cut them out and start over. A benefit of using EZ-Hang brackets is that hinge binding is next to impossible to have happen when installing new doors. The brackets keep the door at a 90 degree angle with the wall. This allows the jamb to fit perfectly with the door and hinges.
Spacing Exterior Door off the Floor
When installing an exterior door, be sure to not to install the door too low. When this happens, there is no room for a rug on top of the finished floor. Sometimes the door even drags on the carpet. The sill that comes attached to the door is normally 1-1/4 inches high. When you start to add underlayments and flooring that space can disappear quickly.
Be aware, when you purchase an adjustable threshold on your door, that does not mean you can raise the height of the sill. That just means you can adjust were the sill comes in contact with the bottom weather stripping. This problem is totally avoidable if you add extra height to the rough opening by installing an extra piece of lumber on top of the subfloor prior to installing the door. Usually a 1/2″ or 3/4″ thick piece is enough to allow room for a rug or thicker carpeting.
Also, be aware if using ceramic tile, an underlayment will be installed on top of the subfloor. This too can cause problems. When you know this in advance, you or the homeowner will be much happy with the installation. Homeowners, or even worse, your wife will get frustrated every time the door is opened and the rug slides away with the door. I bet you will get a phone call on this one. Most contractors usually only make this mistake once.
The point here is to be aware of what you will be installing on the floor and their thickness. Another tip, you may need to increase the height of the rough opening to allow the door to be raised. The door height is not tied to the sub-floor, but rather the height of the finished floor. Planning ahead can save a lot of headache down the road!

Door Installation Has Never Been Easier
- Install 5X Faster
- Eliminate Shims
- Perfect Fit Every Time


