How to Correctly Tile a Shower
A newly tiled shower can be just the thing to easily give life to an old or outdated bathroom. Not only can it improve the looks of your bathroom, re-tiling, or installing a newly tiled shower can ensure your shower will be performing properly for many years to come.
Sometimes older showers have leaks or moisture buildup that the homeowners remain unaware of for many years, leading to long term issues. Ensuring that your shower is properly tiled will circumvent these potential problems and keep your home free of any possible danger.
Tiling a Shower: Kerdi Vs. Traditional Methods
Generally speaking, there is a traditional method of tiling a shower, and a newer more efficient method. The traditional method involves installing a vapor barrier, then adding and waterproofing cement board, then attaching your tile. The second method is to use Kerdi waterproofing membranes, which can be installed right on top of drywall, and act as a flexible barrier to keep the water where it belongs.
In our example that we’ll be showing here, we went with the Kerdi system, which tends to save time and make the process a little more simple. However, it can be difficult to get right if its your first time, and you need to make sure that you’re using the correct kind of cement to install the membrane.
We will however, first be explaining how to prepare for tile using the traditional method of using cement board, then go on to talk about how to use the Kerdi system.
Traditional Tiled Shower
What You’ll Need
- Tile/Spacers
- Vapor Barrier
- Cement Board
- Thinset
- Grout
- Trowel
- Jigsaw
- Tile Saw
- Level
Before you get started, you’ll need to select what type of tile you want and how much you need. Just measure the area of each wall, length x height, and add them together. You’ll also want to add an extra 10% just in case.
Preparing the Shower Area
First, you’ll need to be sure to clear the area that you’ll be working on. If you’re replacing tile in a shower or removing any other type fixtures, it’s best to remove everything to the studs. It’s sometimes possible to remove just the tile and leave the backing board if you’ll just be replacing the tile, but it’s often easier to just replace everything.
Be sure to disconnect the power to the bathroom if you’re going to be working around any outlets or lights. After you get everything torn apart, keep an eye out for black mold if you’re working in an older house.
You’ll also want to lay something down to protect your tub and floors if you’re just replacing the tiled walls. In this example, we’ll be tiling a new shower, so we don’t need to worry about this step.
1. Install a Moisture Barrier
To install, just hang the plastic barrier around the walls that you’ll be tiling, and staple it to the studs. Put the bottom of the plastic so it’s barely touching the base of the shower.
2. Install Cement Board
The cement backer board is what your new tile will be attached to. Cut the backer board to be flush with the drywall at the edges of the shower and leave a 1/4 inch gap at the shower base (if the base is a separate unit – In our case the floor is tiled as well). The height of the backer board will just depend on how tall your shower is.
Secure the cement board to the studs with cement board screws, attach a screw every 8-10 inches. You can put shims underneath the board to get your 1/4 inch gap from the base as well.
To cut out the curved areas where the plumbing will be, it’s easiest to use a grinder with a diamond blade or a jigsaw with a carbide blade. Be sure to wear a respirator and cut the cement board outside to avoid breathing in any dust, as it’s harmful if inhaled.
3. Tape the Joints
Next, we’ll use cement board tape to tape the joints where the pieces of cement board meet, and apply a thin coat of mortar over the tape. We’ll need to allow the mortar to dry overnight.
4. Apply Waterproof Coating Membrane
Now you’ll apply a waterproof coating over the cement board that will act as a membrane. Brush the coating on the seams and joints and allow the coating to dry, per the instructions. Then coat the cement board using a roller.
5. Plan the Layout of the Tile
You’ll want to plan the layout of the tile so you don’t end up with small pieces at the end of a row near the joints. You can do this by marking a vertical line at the center of the wall you’ll be working on, then starting in the center, layout the bottom row of tile. If the end pieces are too small, adjust the layout so the ends will have larger pieces.
Now you can check the layout for the top. Its best to start one row up from the bottom when you start laying the tile, just in case the base isn’t level. If this is the case, use a level to find the lowest point in the base, place a tile in that spot with a 1/4 gap at the bottom and spacer at the top, then mark and extend this line across the wall. This will give you a level line to work from.
To get your starting line at the top, measure up how many rows you’ll need and mark the spot. Do this for each wall.
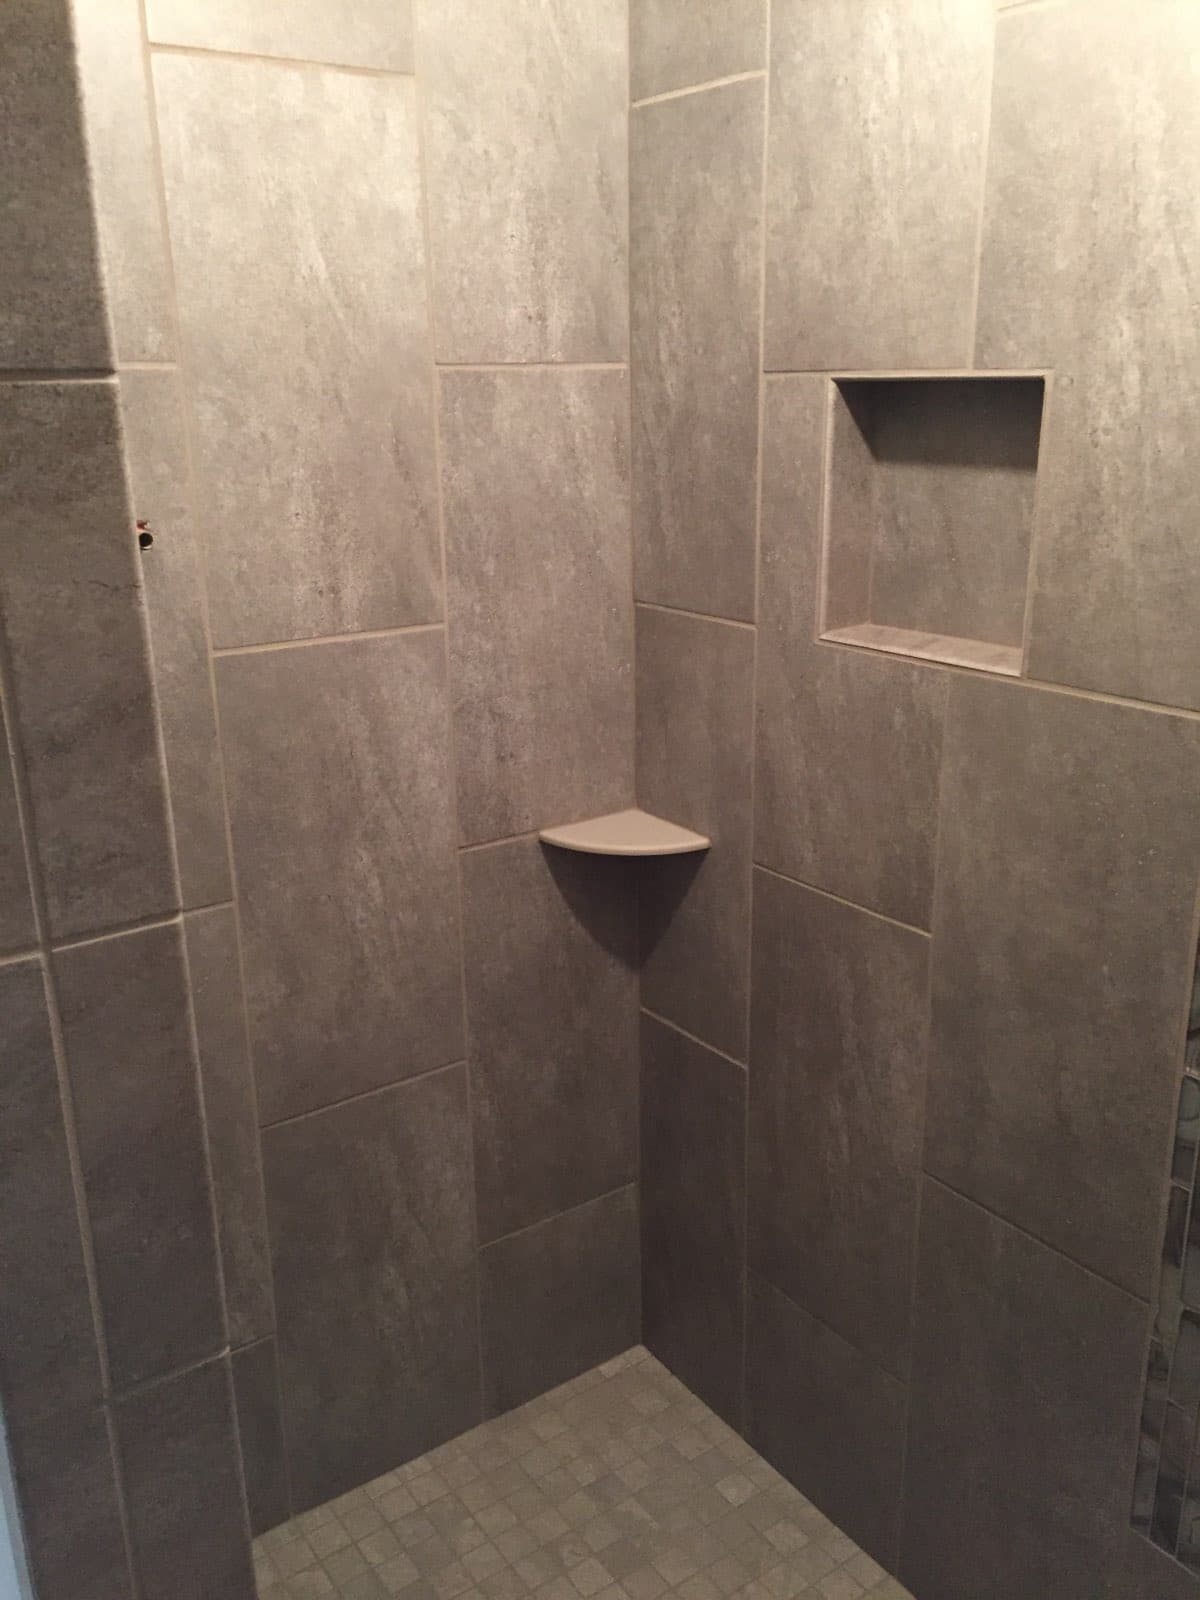
In our tile, we put a design in the center using a smaller tile, but for this article we’ll keep it simple and assume you’re using one type of tile throughout the shower.
Tiling the Shower
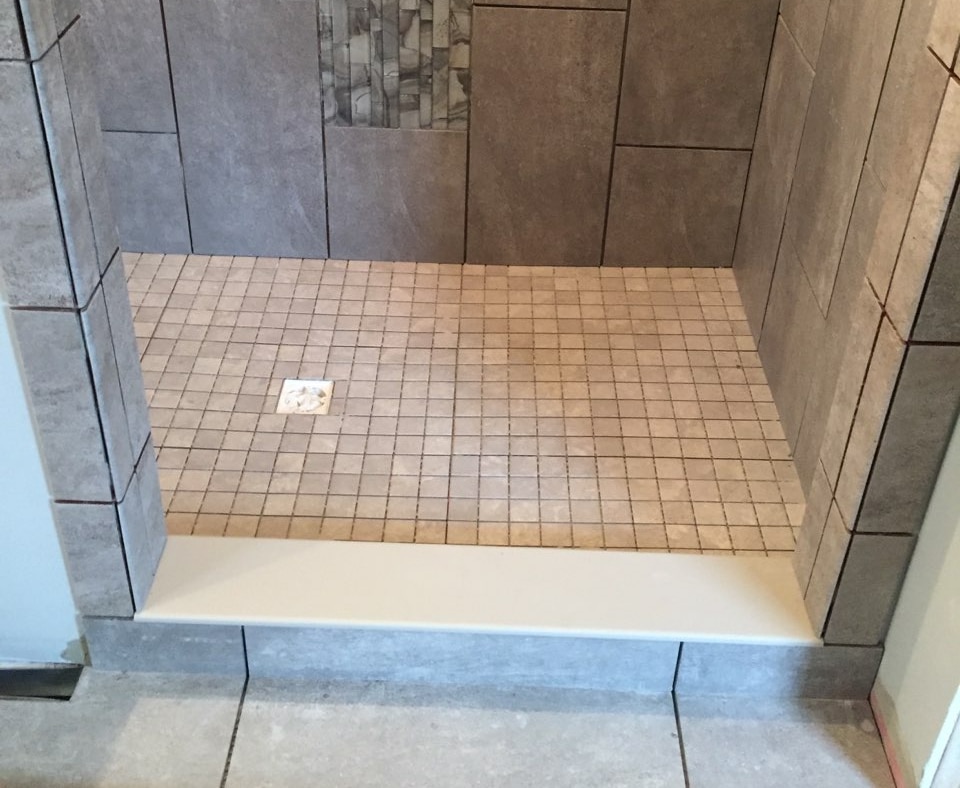
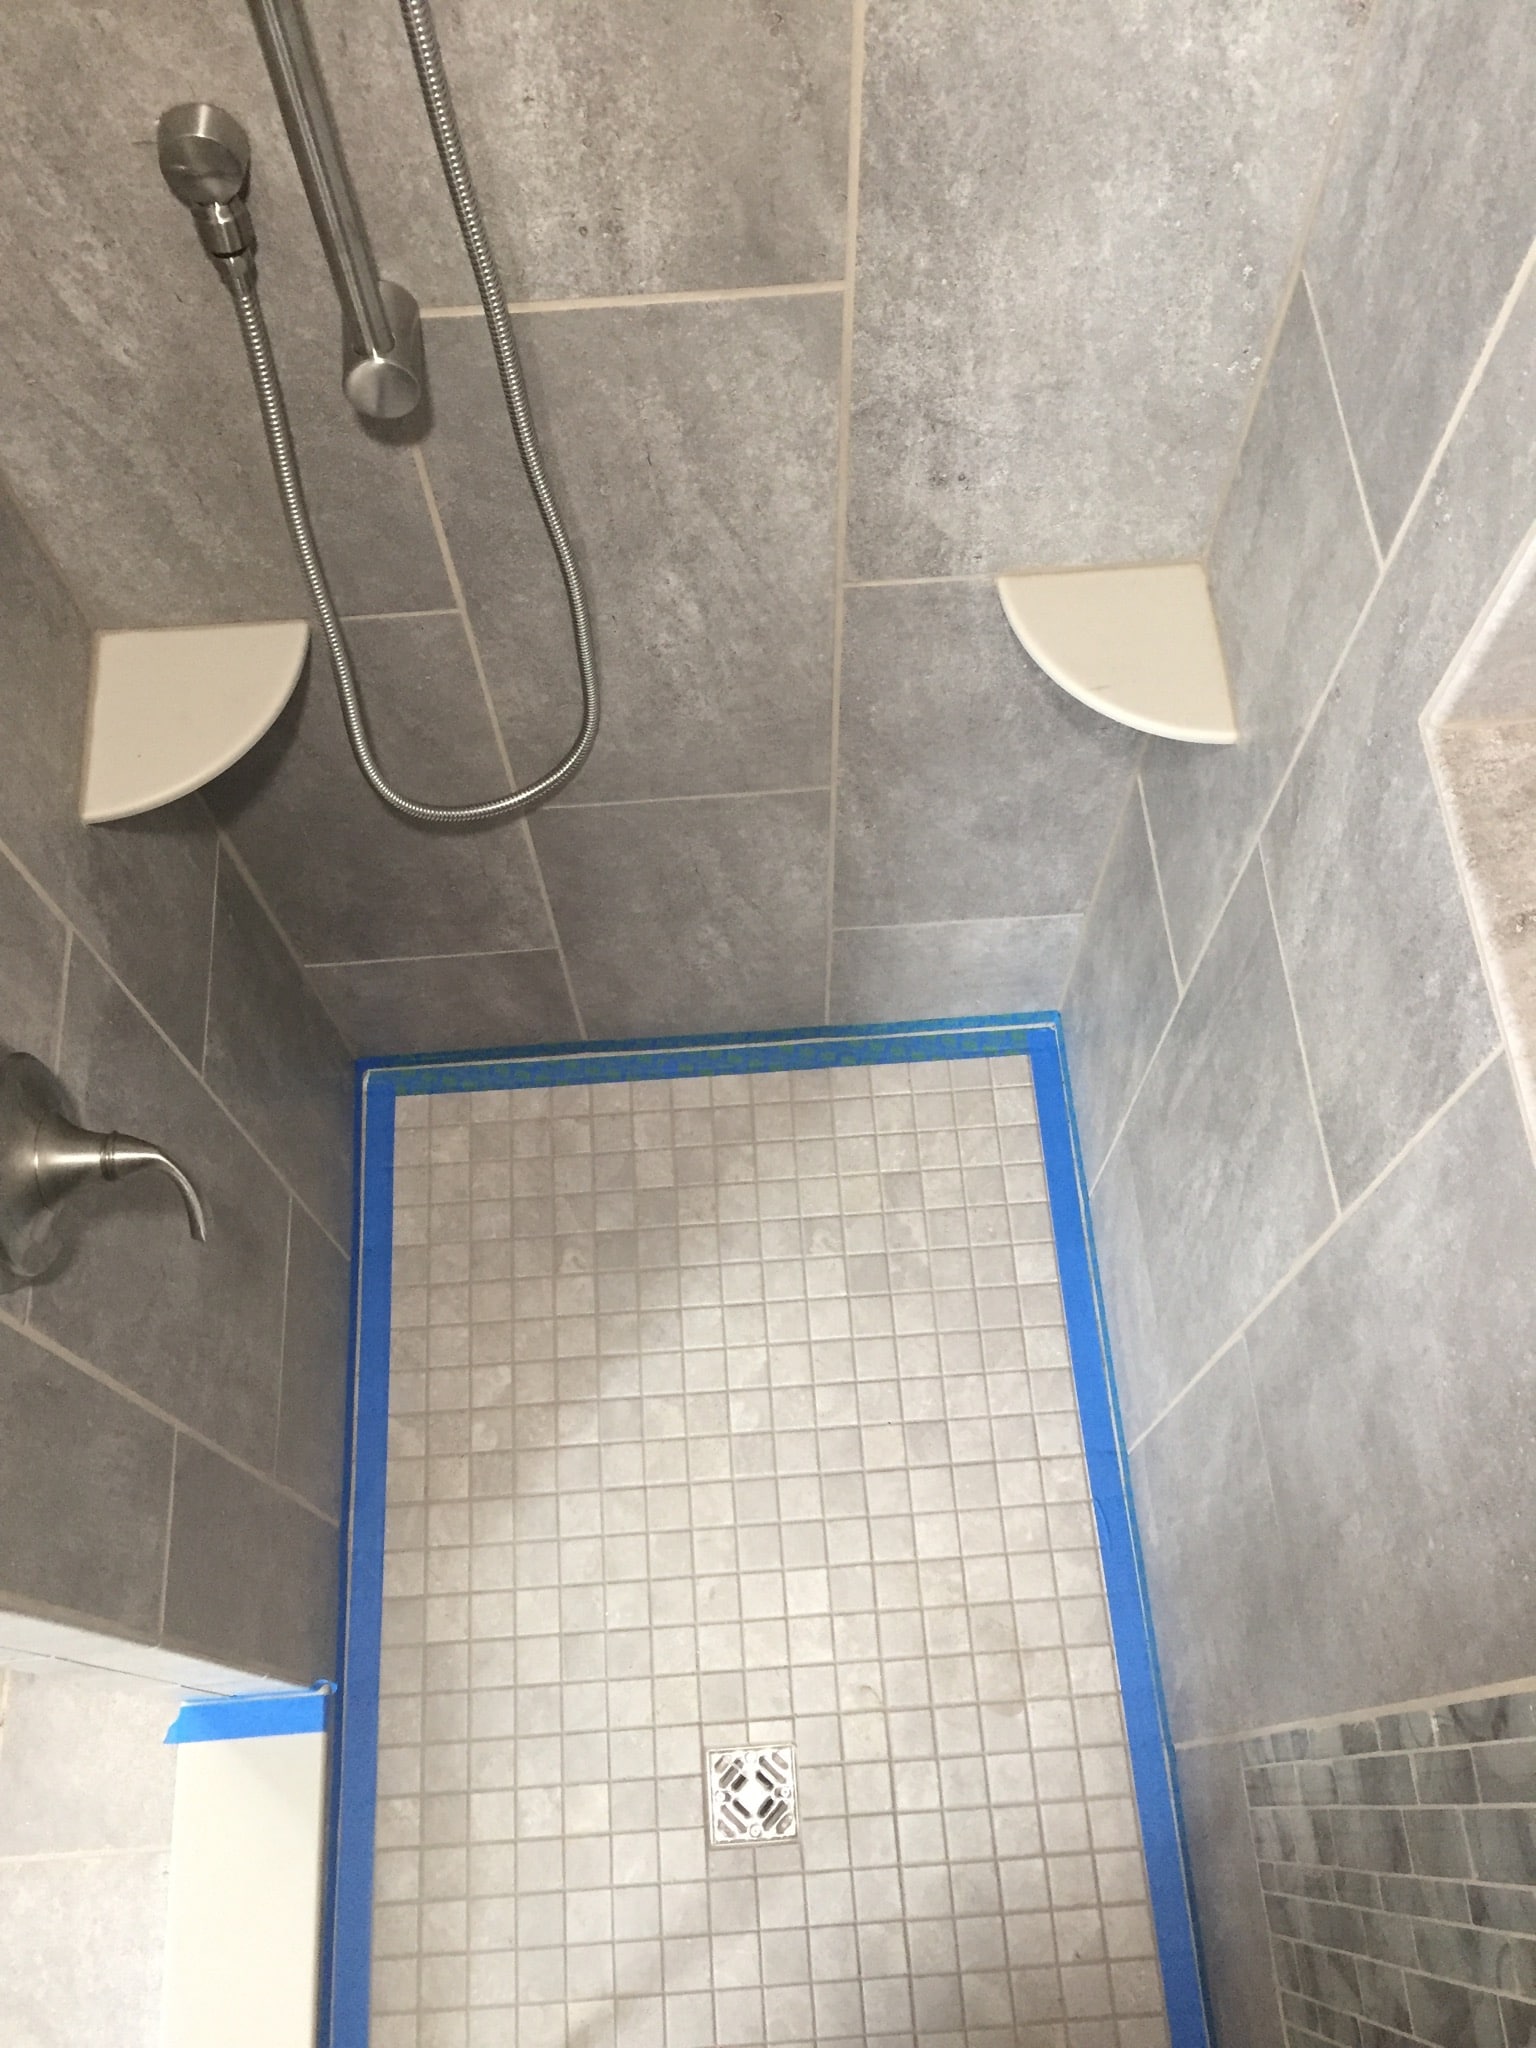
1. Prep and Cover the Shower Base
First, if you have a separate base and won’t be tiling the floor, you’ll need to cover and protect the base so it doesn’t get damaged while you’re laying the tile. Is our case, we tiled the shower floor as well, so there was no separate unit to worry about. You can see the finished base here:
2. Start The Bottom Row
Start the first row by finding the lowest point around the edges of the shower floor with a level. Draw a level line with a 4′ level all the way around the wall up from the floor the distance measured from the lowest point. This allows you to cut the remaining tile to fit close to the floor. Never screw a board to the wall as it will pierce any waterproofing you have in place.
3. Mix and Prepare Thin-Set
Now you can begin mixing and preparing the thinset that you’ll be using to attach the tile to the wall. Be sure to follow the instructions to get the proper mix consistency.
Spread the thinset along your guide board in a small area where you’ll be working, and then comb over the thinset with the notch-side of your trowel in one direction.
4. Lay First Row of Tile
Take your first piece of tile and apply it in the position you planned while determining your layout. The use spacer to properly space your next piece of tile in the row. Do this until you get to a corner, where you’ll need to cut the piece to fit.
Apply thinset to the wall and set tile on the designated area of the wall. Make sure it is exactly on your starting line. Then place spacers around the edges.
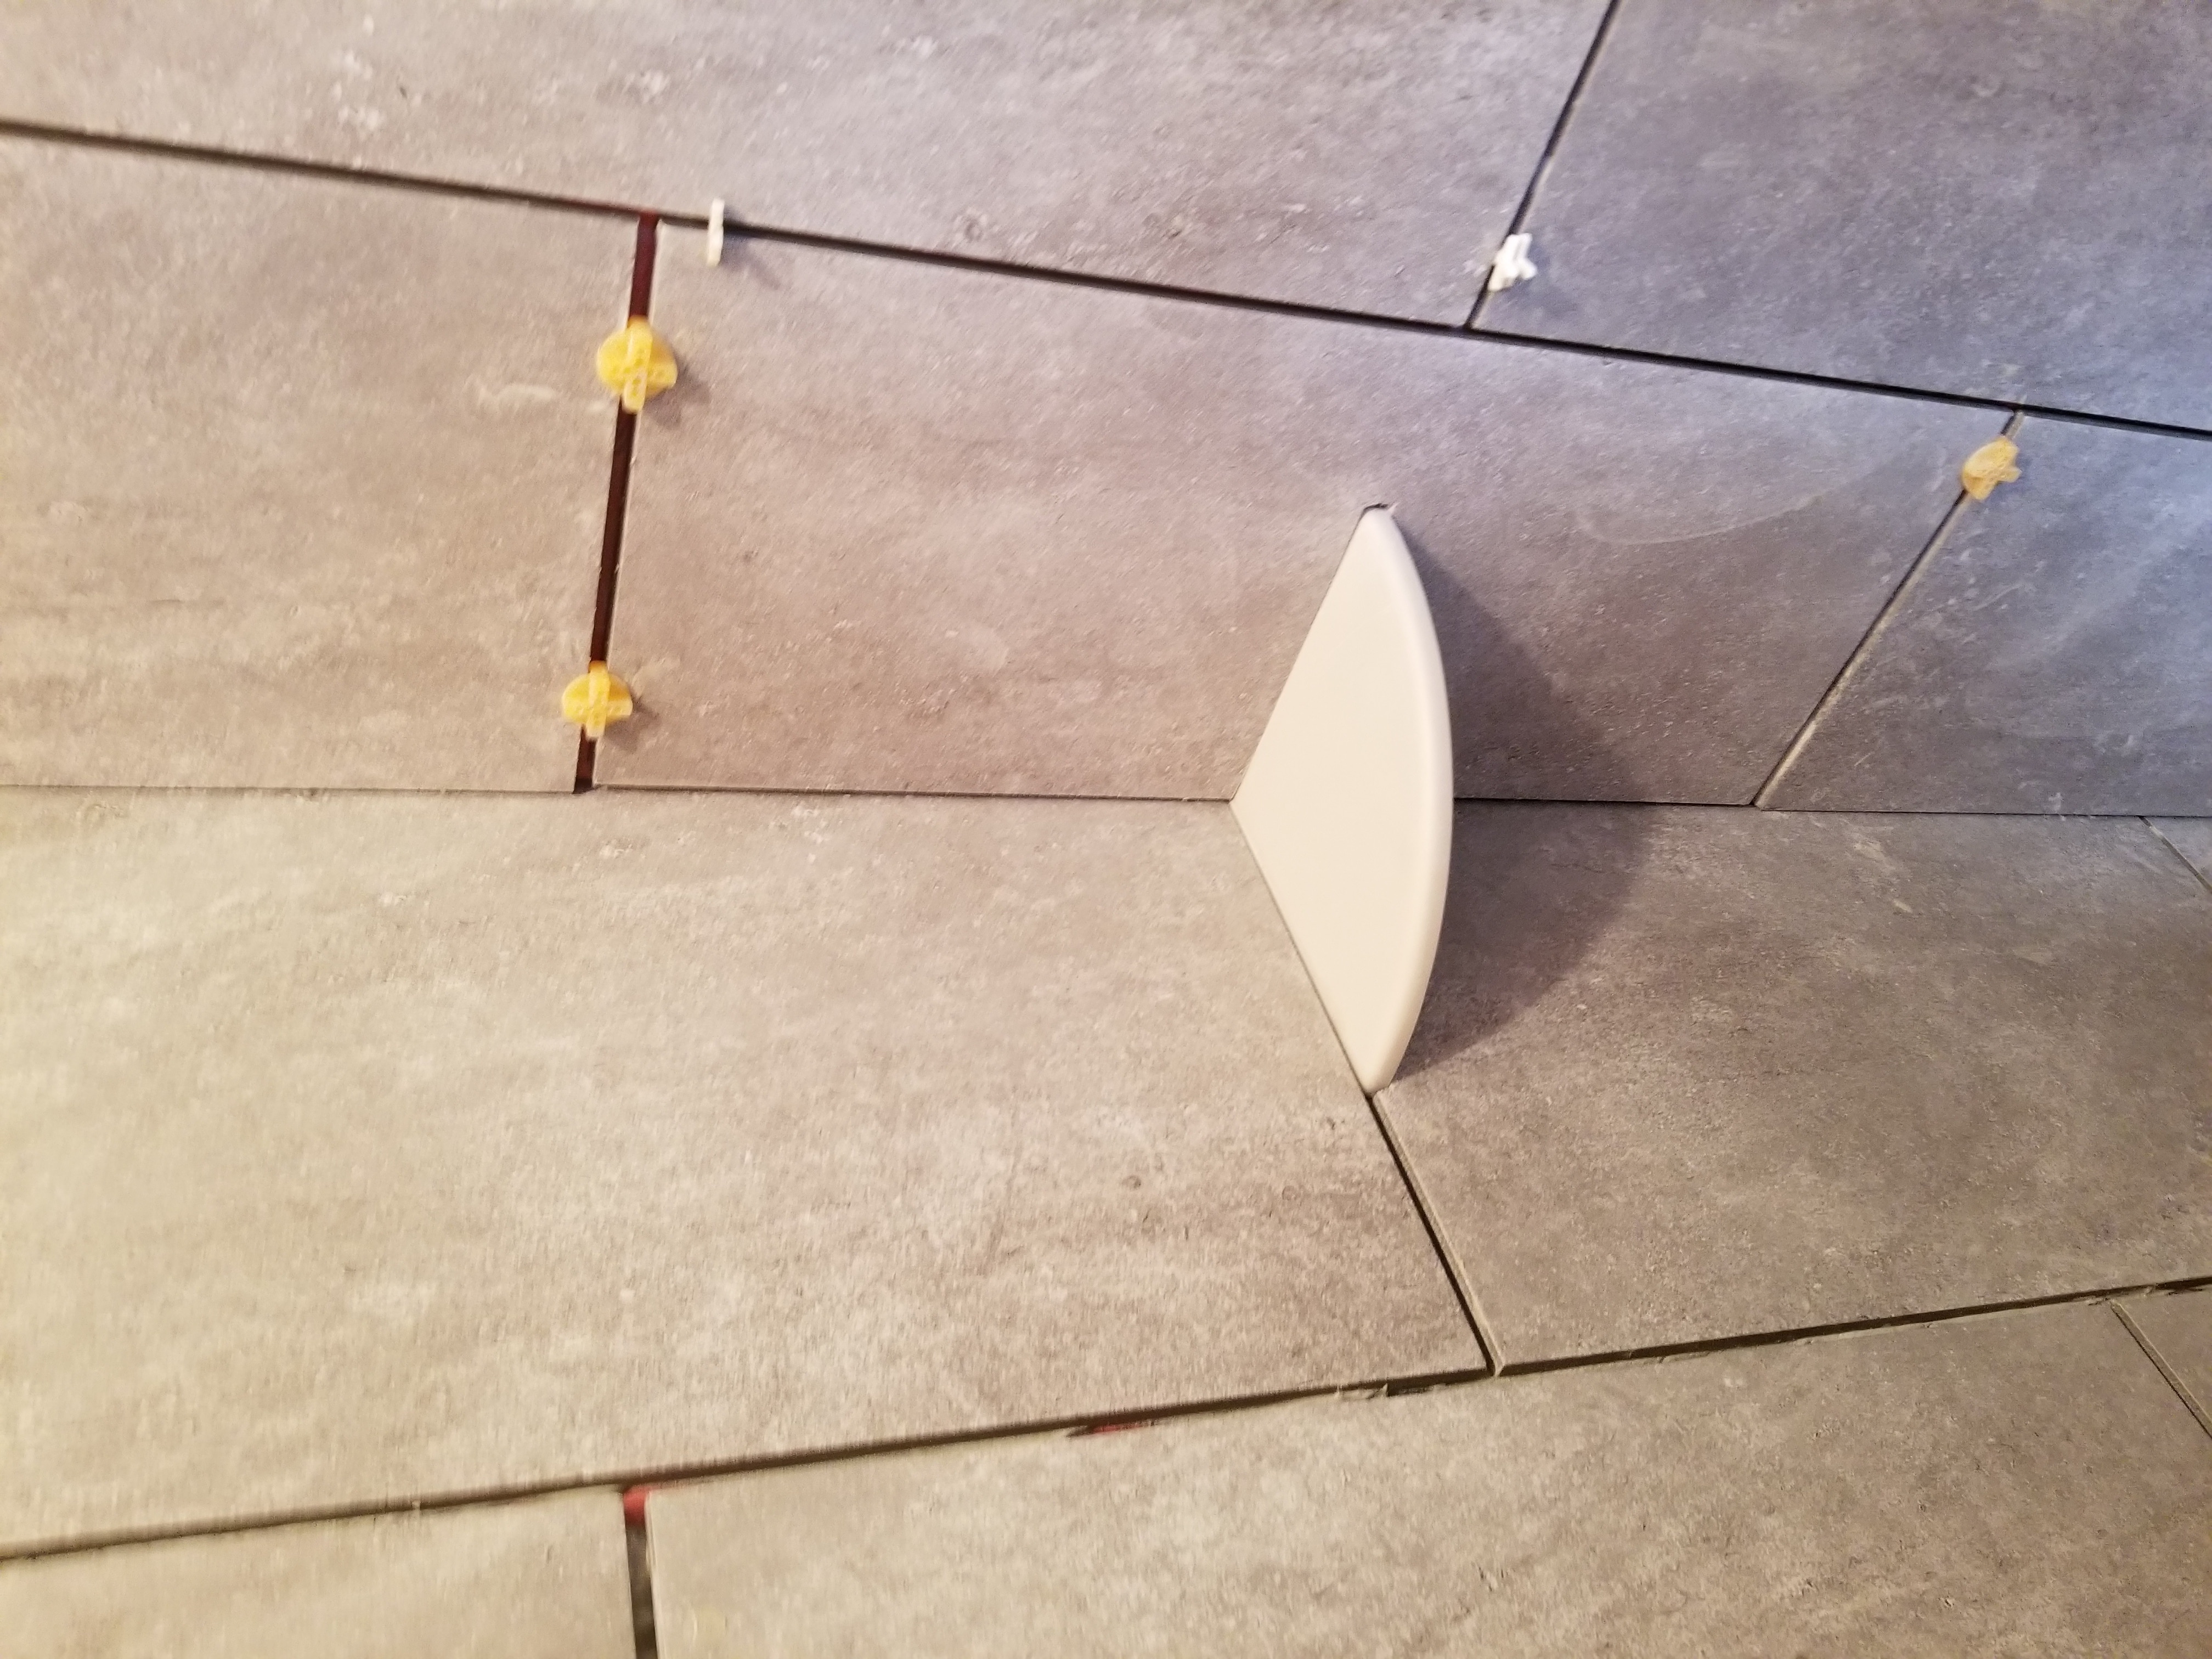
5. Check for Level and Continue adding Rows
When you move up and continue to add rows, if installing large tiles be sure to stagger your joints. This not only will make the shower look better, it will also decrease what is called lippage. This is when the tiles don’t fit flat with adjoining tiles. You’ll also want to periodically check each row for level to make sure you’re still on track. Make sure you add spacers to better hold the tile in each direction to get the proper spacing.
6. Wait 24 Hours and Apply Grout
Apply the grout with a rubber float, working the grout through the joints diagonally. It’s best to do walls a section at a time, rather than doing the entire wall. Wait about ten minutes, and wipe the excess grout with a damp sponge from the section you just applied grout to. Be careful not to wipe away any grout from the joints.
After a few days, when everything is dried and settled, apply a grout sealer to the tile, and silicone sealer to the corners and edges of the tub and all joints.
Tiling a Shower With Kerdi
Kerdi is a pliable sheet-applied waterproofing membrane and vapor-retarder designed for the direct application of tile, mad by Schluter. Due to its ease of use, it has become the default method for many contractors when it comes to tiling showers.
The Kerdi membrane gets installed using a non-modified cement. It’s important that you use non-modified cement or the specific brand recommended by Kerdi, otherwise it will not adhere properly.
Schluter also sells a trowel with there products that has smaller grooves and works well for properly apply the cement.
Installing the Kerdi Membrane
Installing the Kerdi membrane to the walls you’ll be tiling is as simple as cover troweling the cement onto the wall, then attached the membrane over the top. For corners and joints, simply overlap each piece by two inches, then cover with cement. Be sure to smooth out any air bubbles that may have built up underneath the membrane.
After the membrane is properly attached, you can tile as you normally would. Here’s a short video from Schluter on how the Kerdi membrane works:
Door Installation Has Never Been Easier
- Install 5X Faster
- Eliminate Shims
- Perfect Fit Every Time